Installation
How to use the StaffTraveler eSIM on a non-eSIM Android phone
Last updated on 10 Nov, 2025
We wrote this article to provide options for people who have phones that do not support an eSIM. Keep in mind that StaffTraveler does not officially support non-eSIM devices, and we cannot provide support for them. If you need help with the eSIM.me adapter and software, you can contact eSIM.me at https://esim.me/contact.
The eSIM.me adapter mentioned in this article is only for Android phones. Although the eSIM.me adapter is currently working, we do not guarantee that it will continue to do so. Usage is at your own risk.
Even though most modern phones support eSIM, some manufacturers still haven't adopted this standard. To help people with phones that don't support an eSIM, we've partnered with eSIM.me. With their product and our eSIM, everyone can enjoy affordable global connectivity.
Step 1
Before you buy your eSIM.me sim card, make sure your phone is compatible with it. Please install the eSIM.me software and do a compatibility check.


Step 2
If your phone is compatible, you need to get an eSim.me SIM card to install the eSIM on your device. You can buy one here. Wait for it to be delivered to your address.
Step 3
Install the eSIM.me software and insert the SIM card. The instructions in the box will guide you clearly through the process.
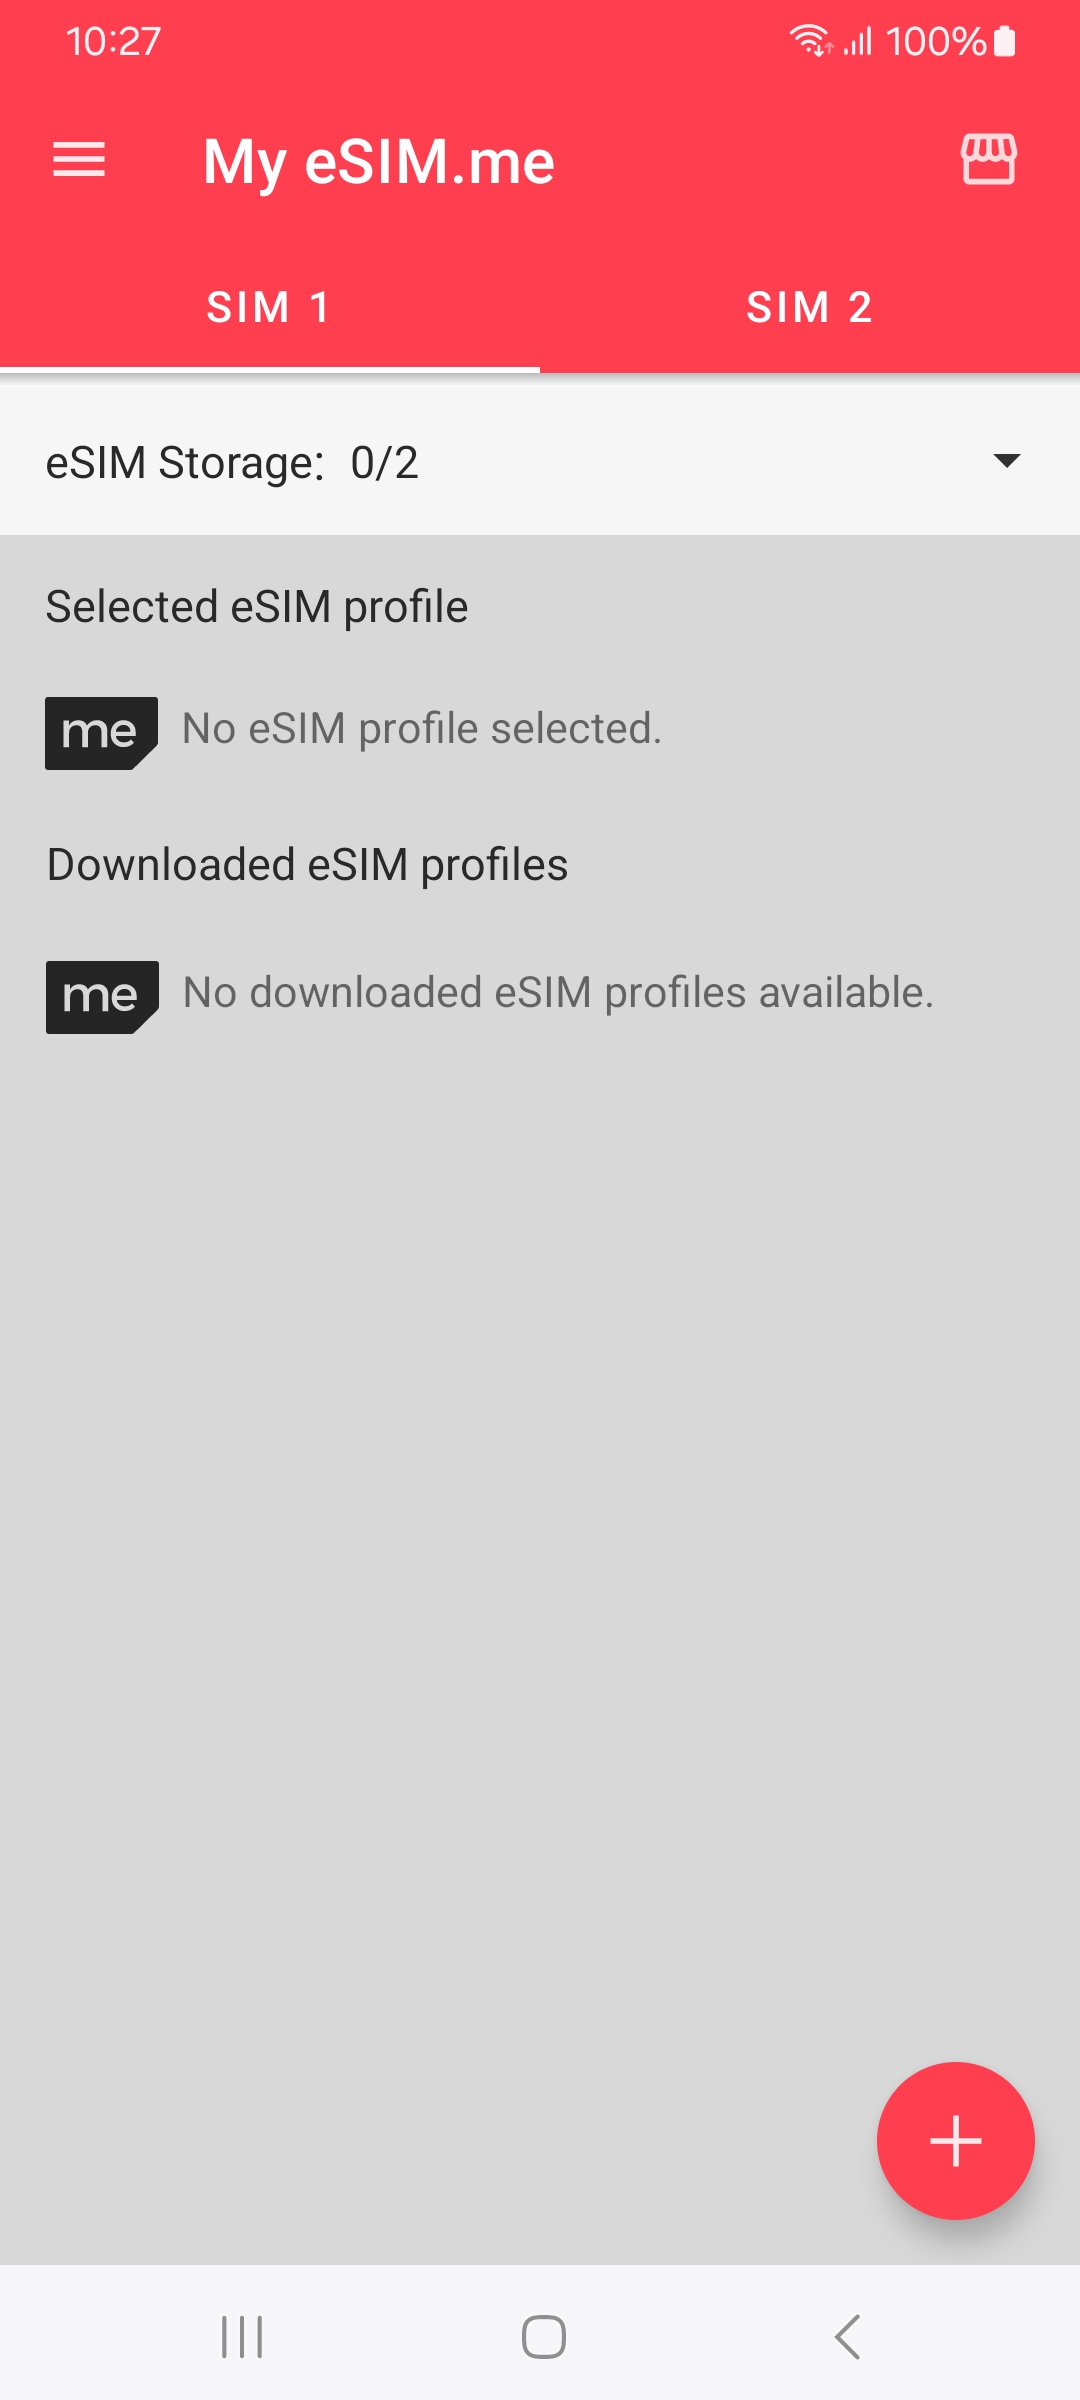
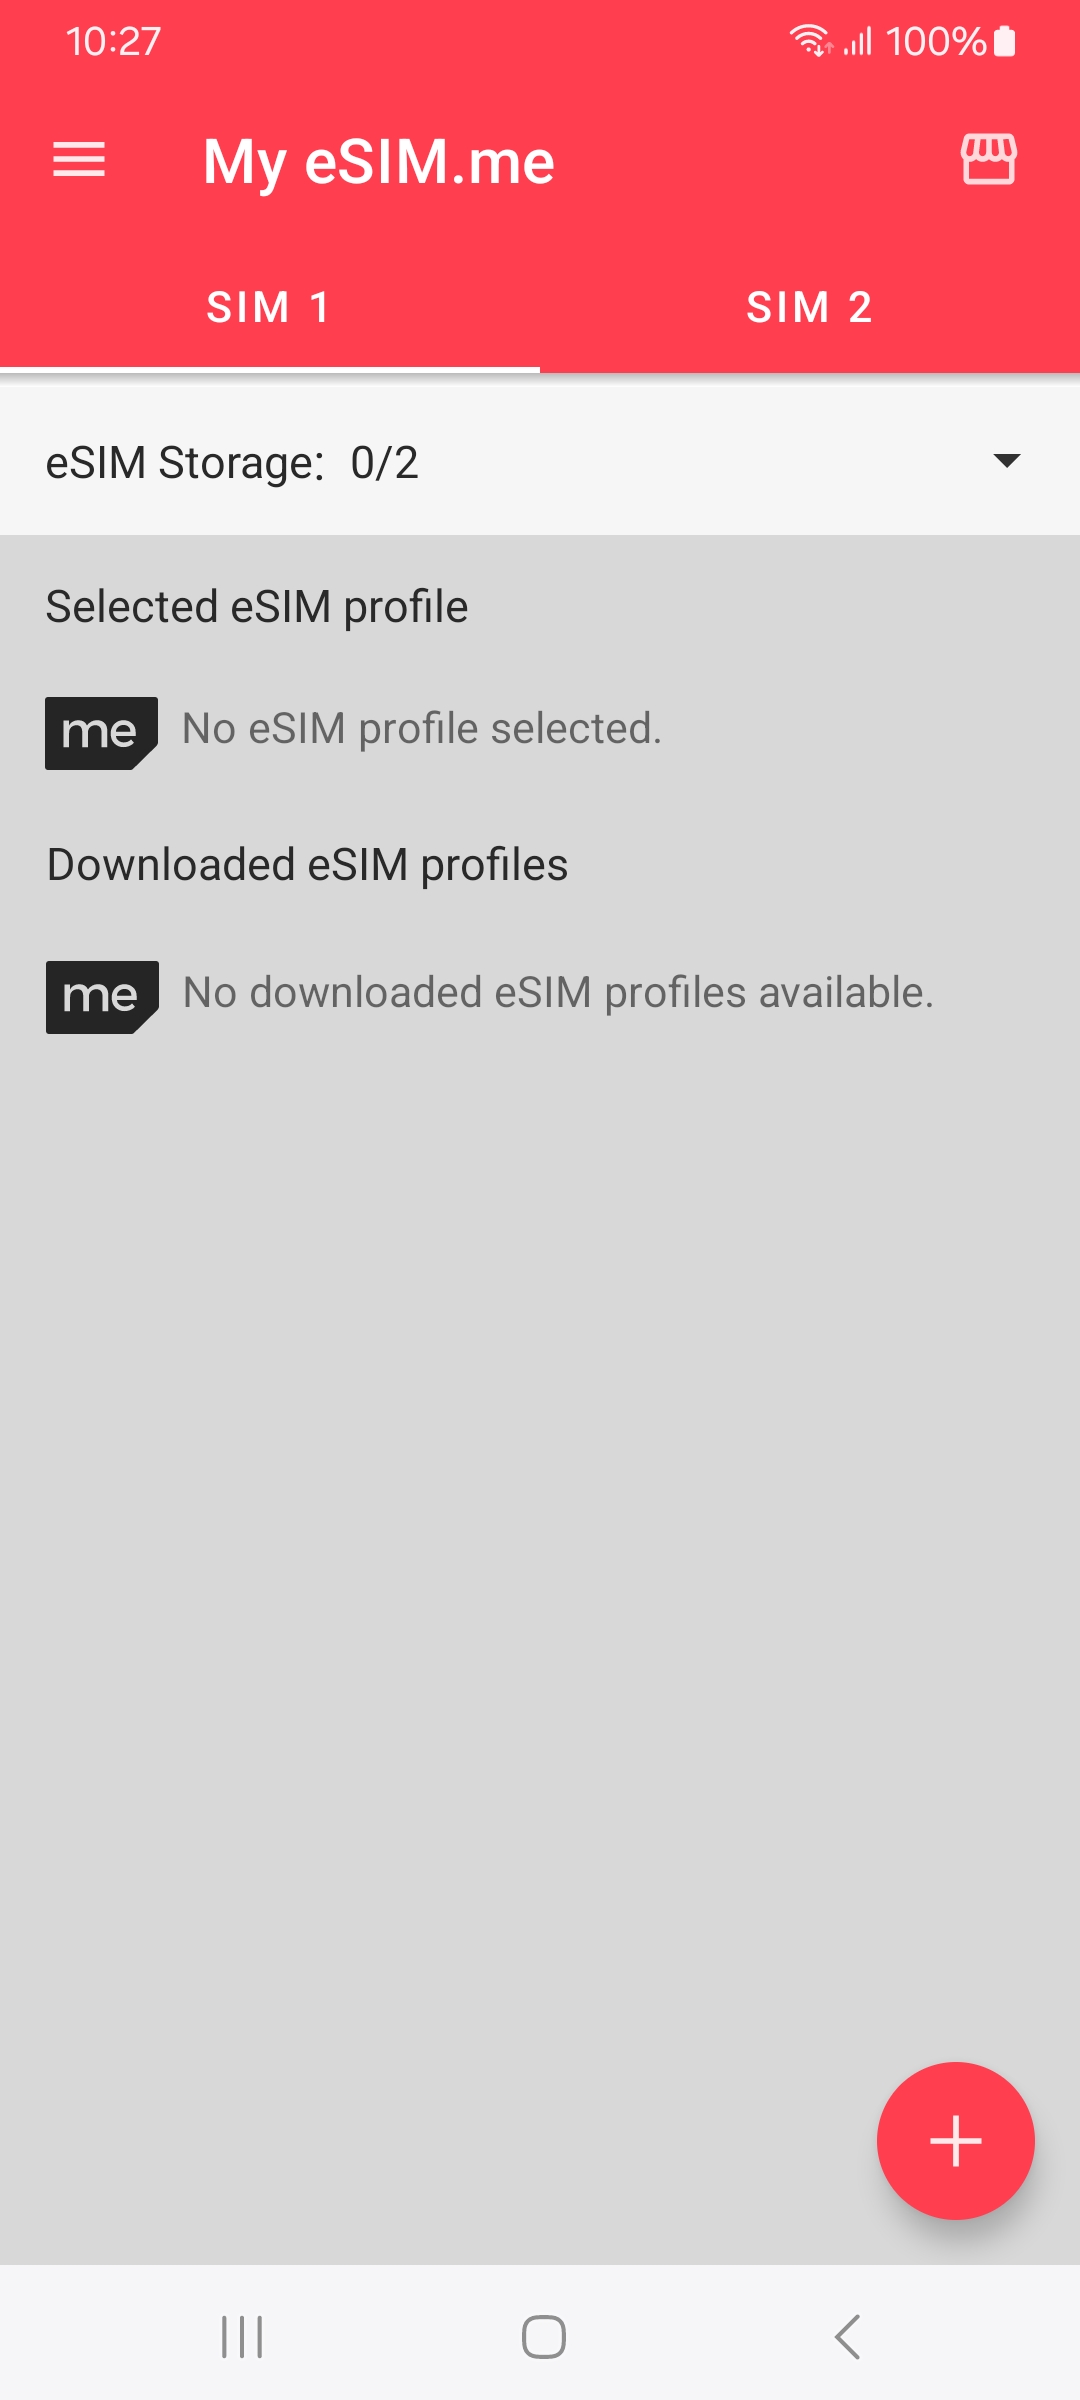
Note: You don't have to add a profile yet. We will do this later. After the setup, you will see this screen.
Step 4
If you haven't already downloaded the StaffTraveler eSIM app, download it here and create a new account.
Note: The StaffTraveler eSIM uses a different account from the StaffTraveler app, so please create a new one.

Step 5
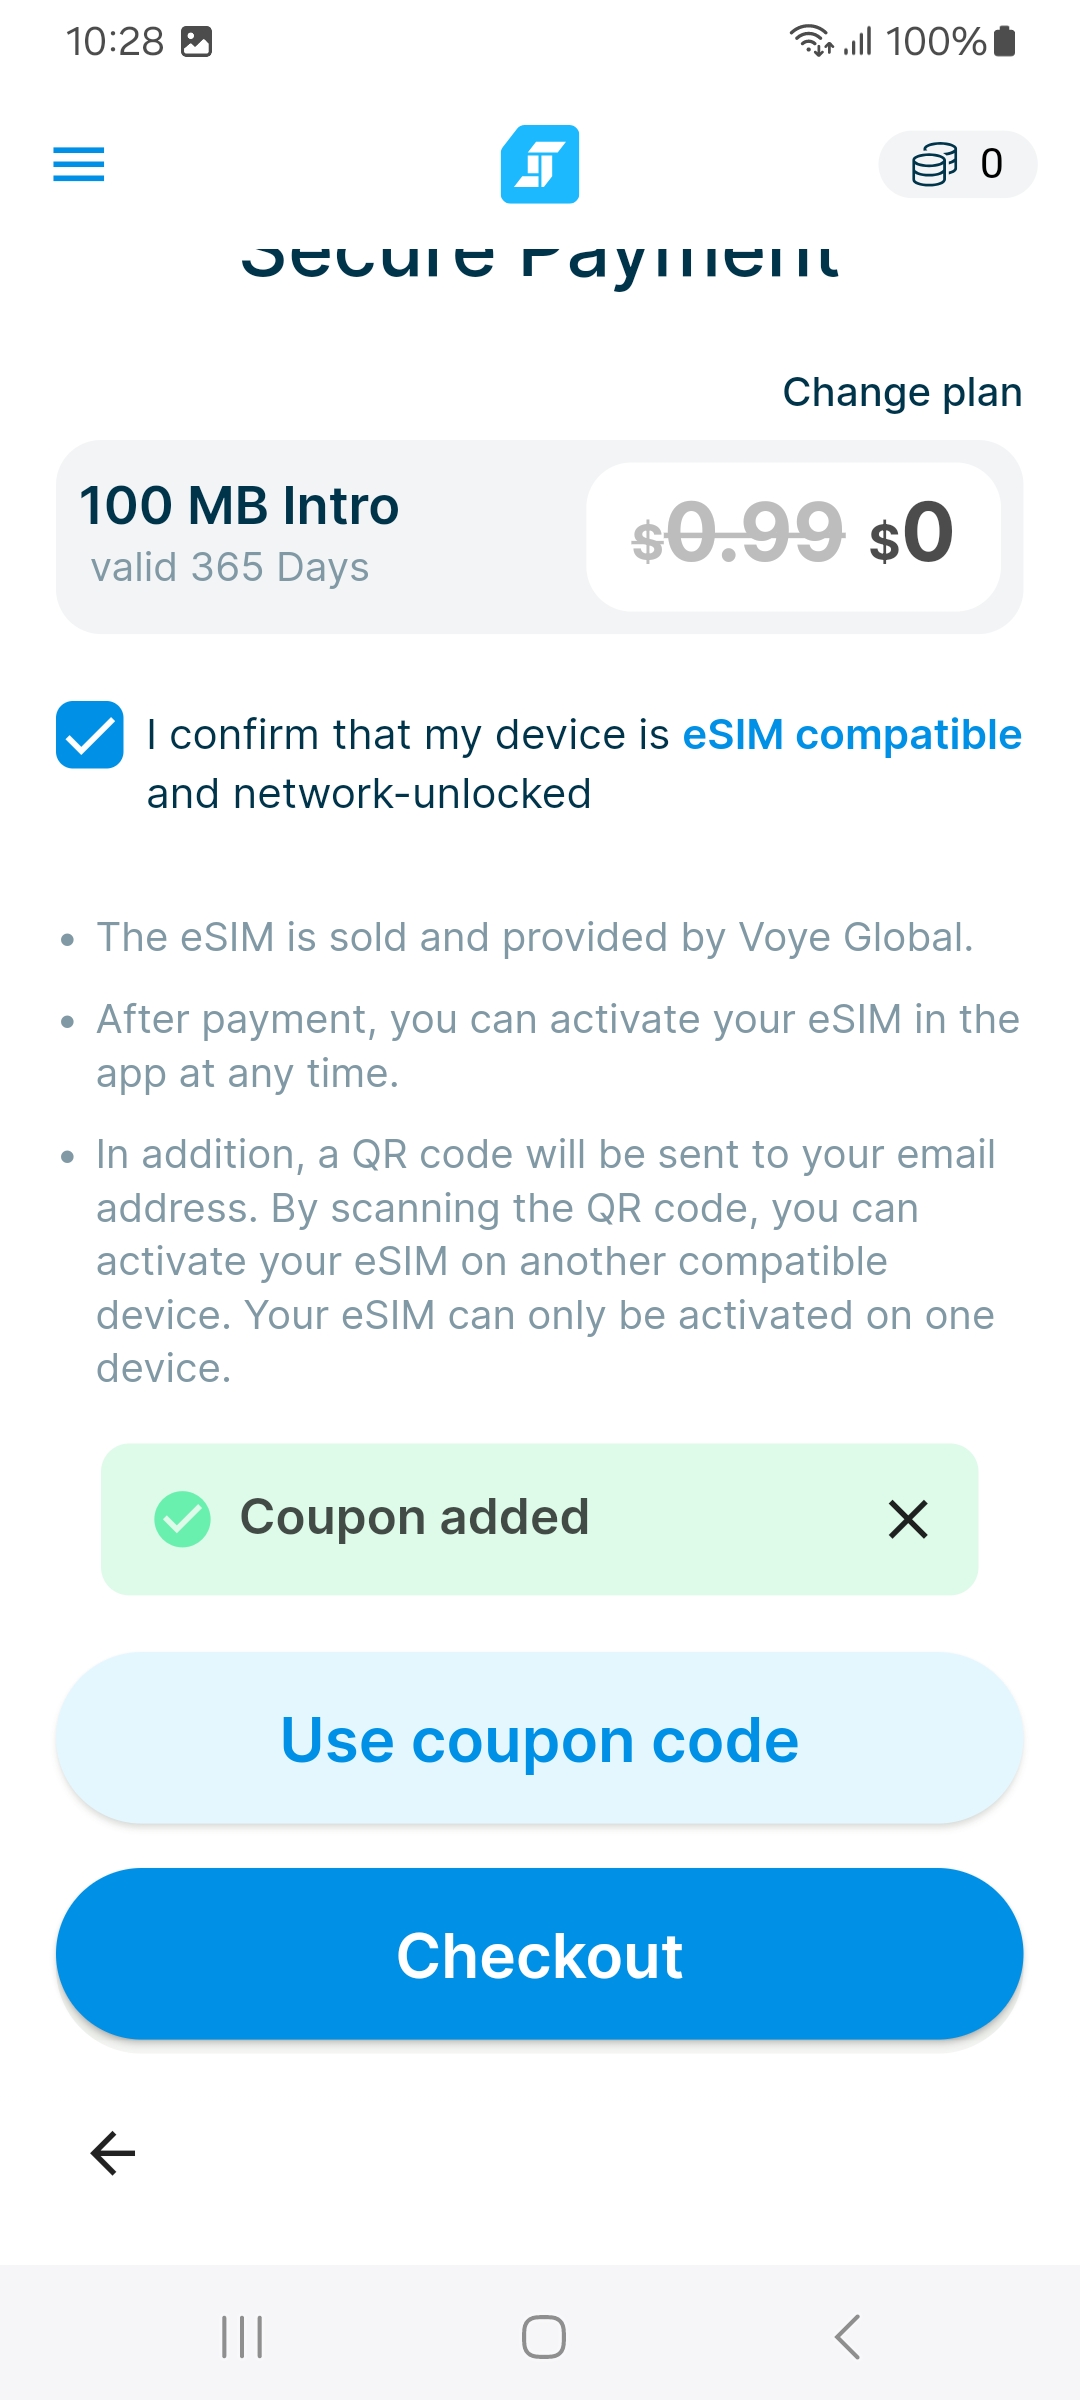
Select a new data plan. You can use the airline coupon code for a discount on any plan above the intro plan or the ST00MB coupon code to get the free intro plan and tap checkout.
Step 6
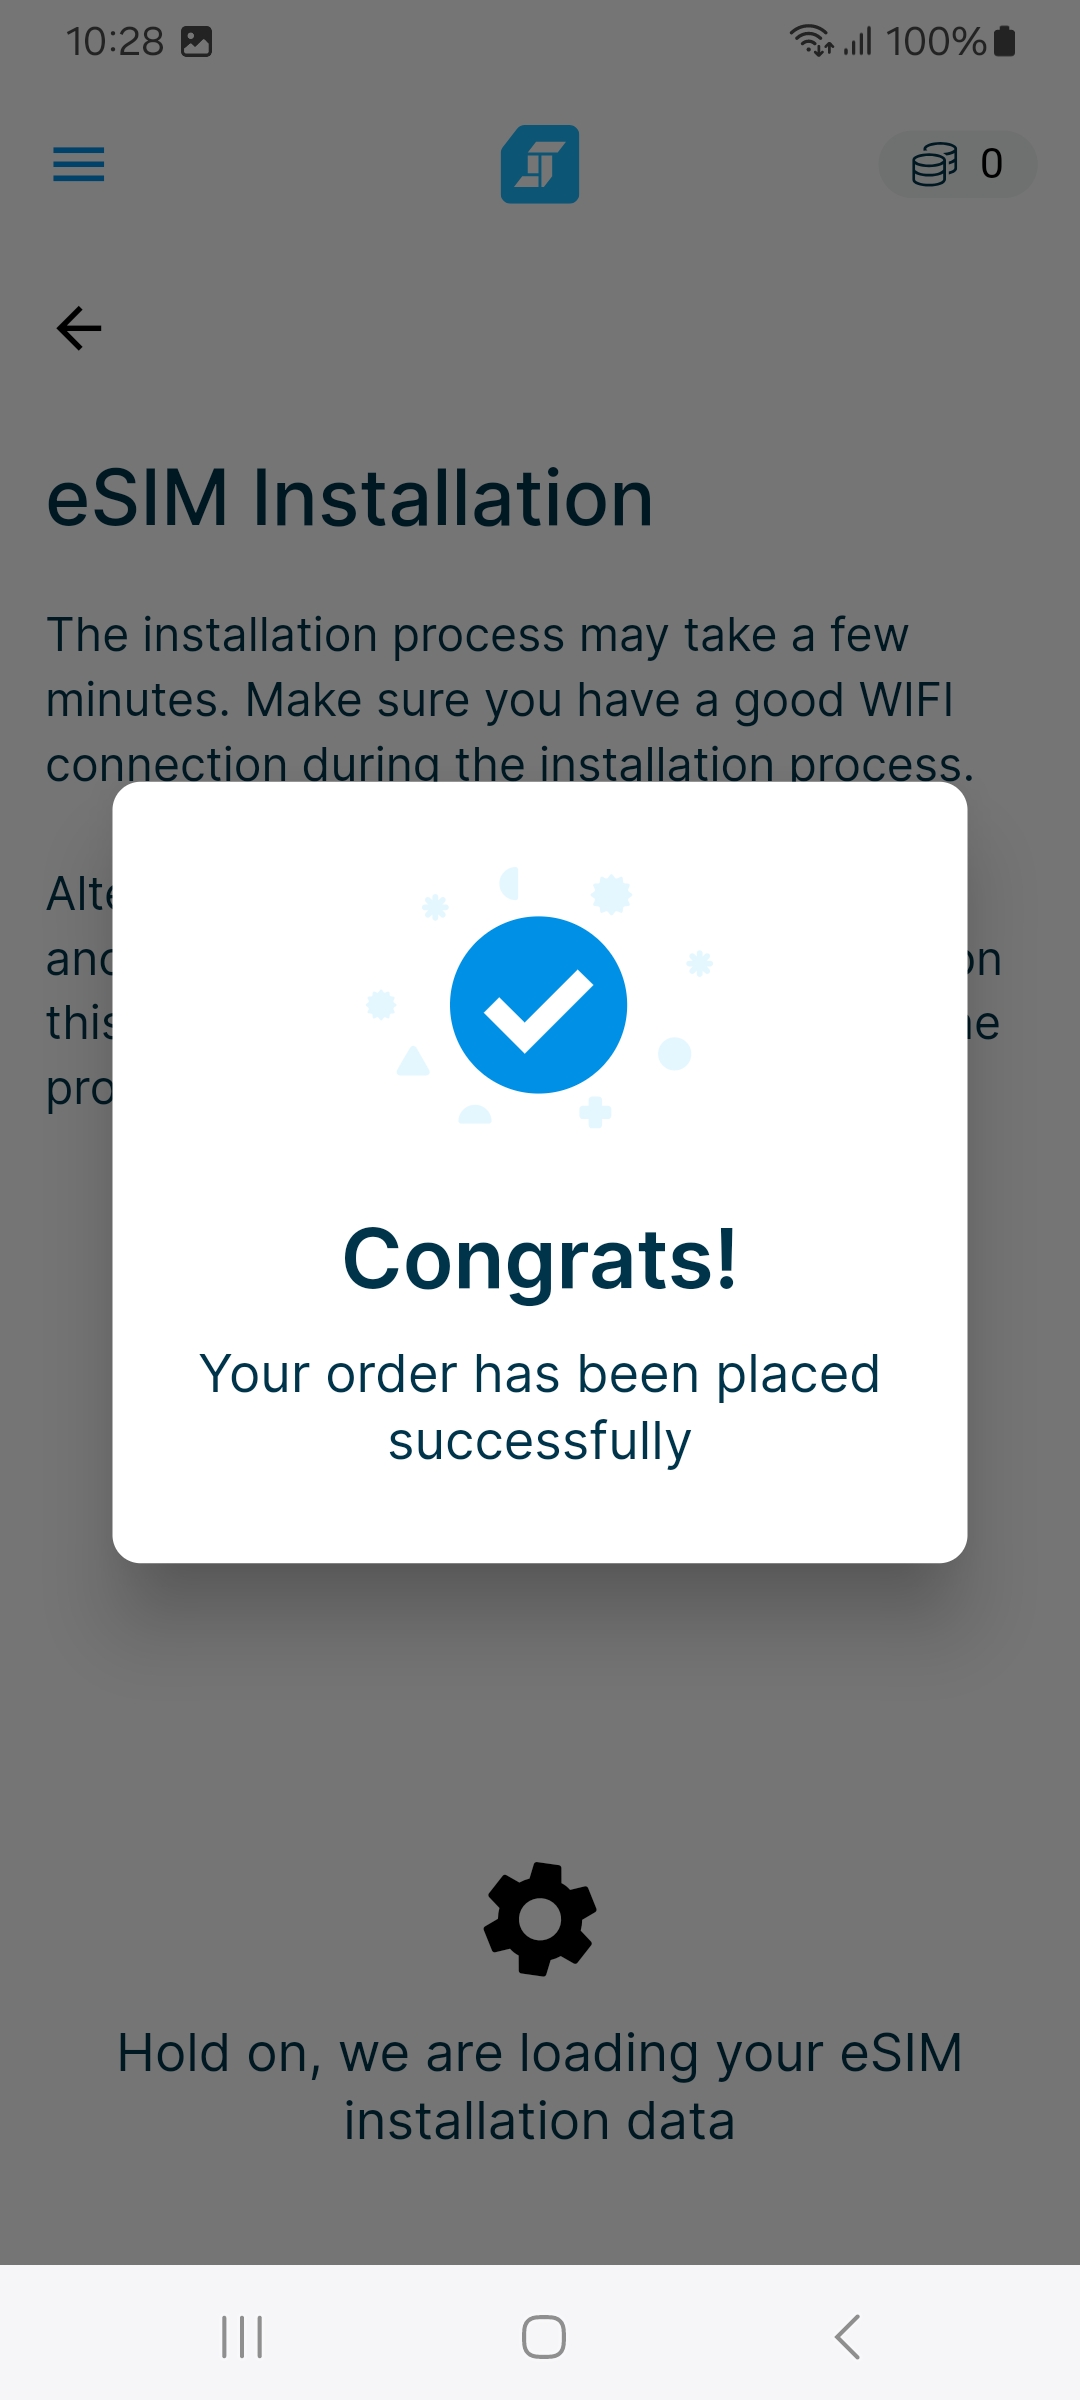
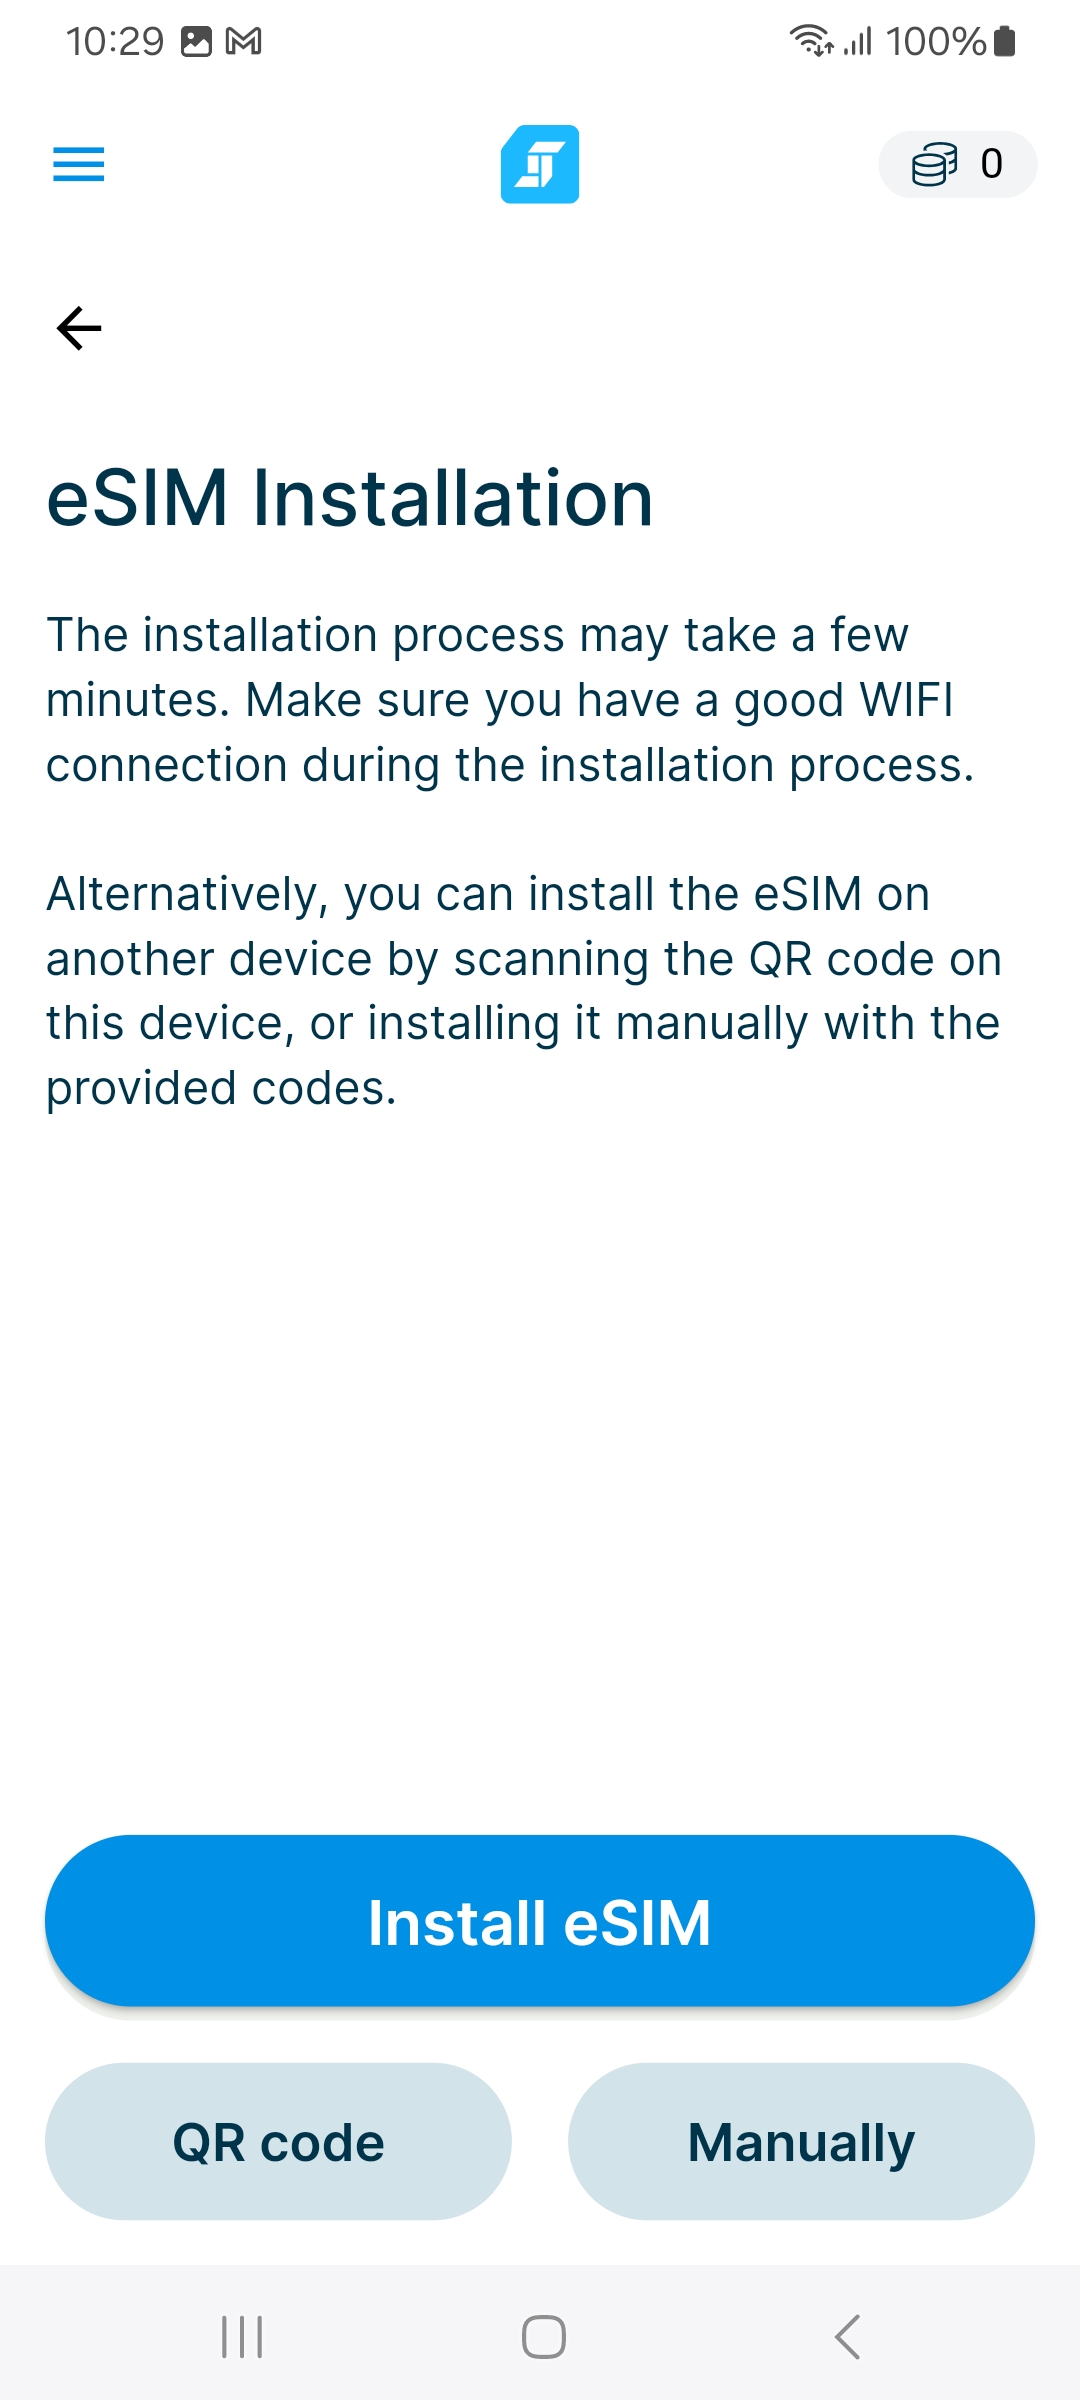
Congrats! You have purchased your eSIM. You will now see the install screen:
Step 7
Do not click the 'Install eSIM' button; this method will fail, and you might lose your eSIM.
There are two ways to install the eSIM to the eSIM.me SIM card. The first one is the easiest. Make sure you have a stable Wi-Fi connection.
Step 8a
Install your SIM using the QR code. You should receive an email with your eSIM QR code backup in your mailbox. If you don't find it, you can also find the QR code by tapping the 'QR code' button, screenshot it, and display it on another device to scan.
In the eSIM.me app, tap the '+', choose the 'sign in': button, and select the QR code.
This will open your camera (after permitting it), and you should scan the QR code that you got in the email.
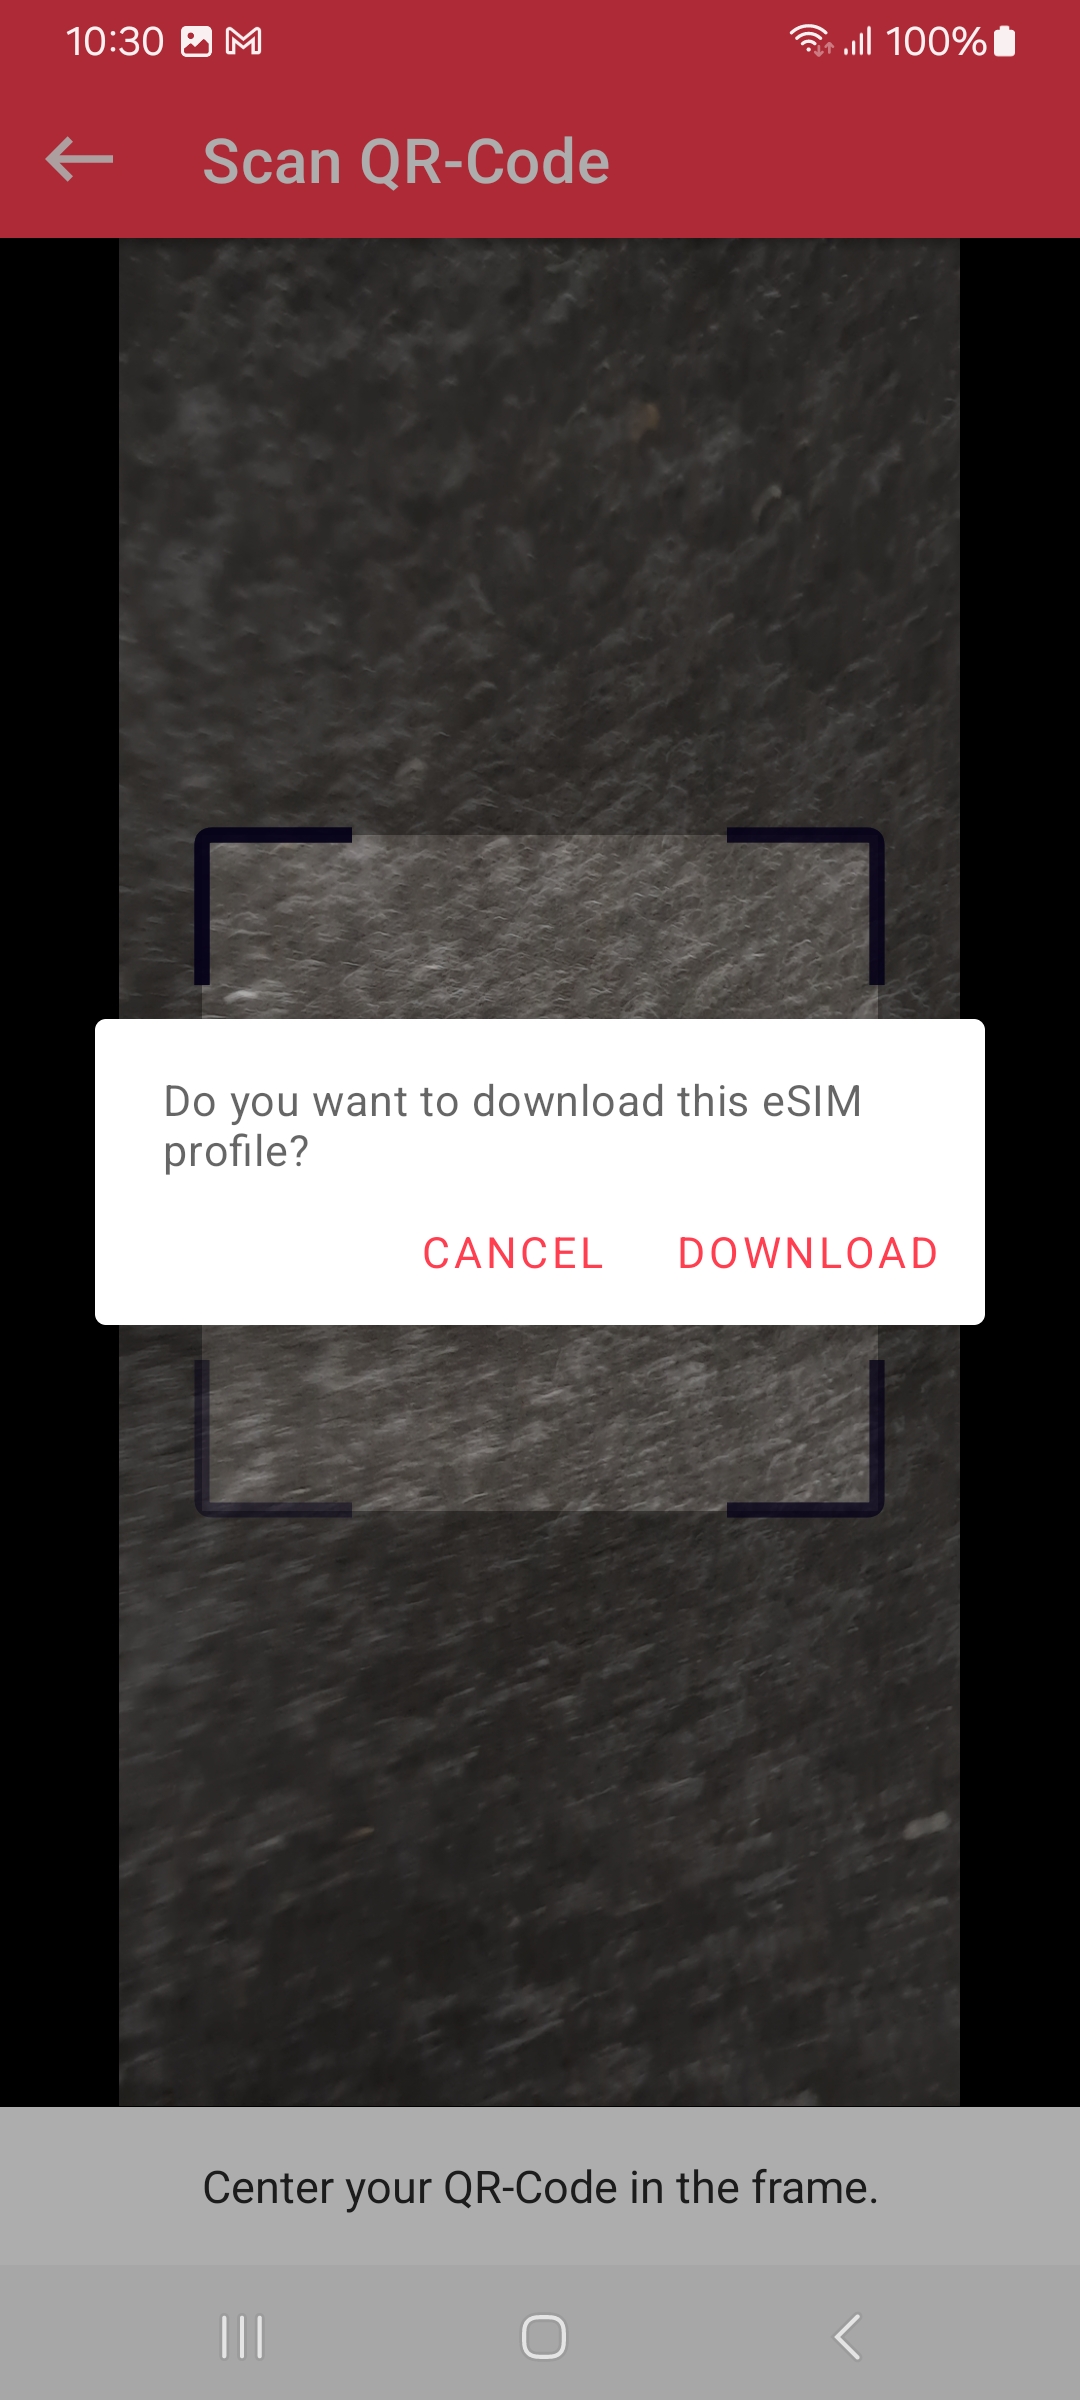
This should now start the installation.
Step 8b - Manual installation
The second way to install the eSIM is as follows: In the StaffTraveler eSIM app, you'll see the following screen:
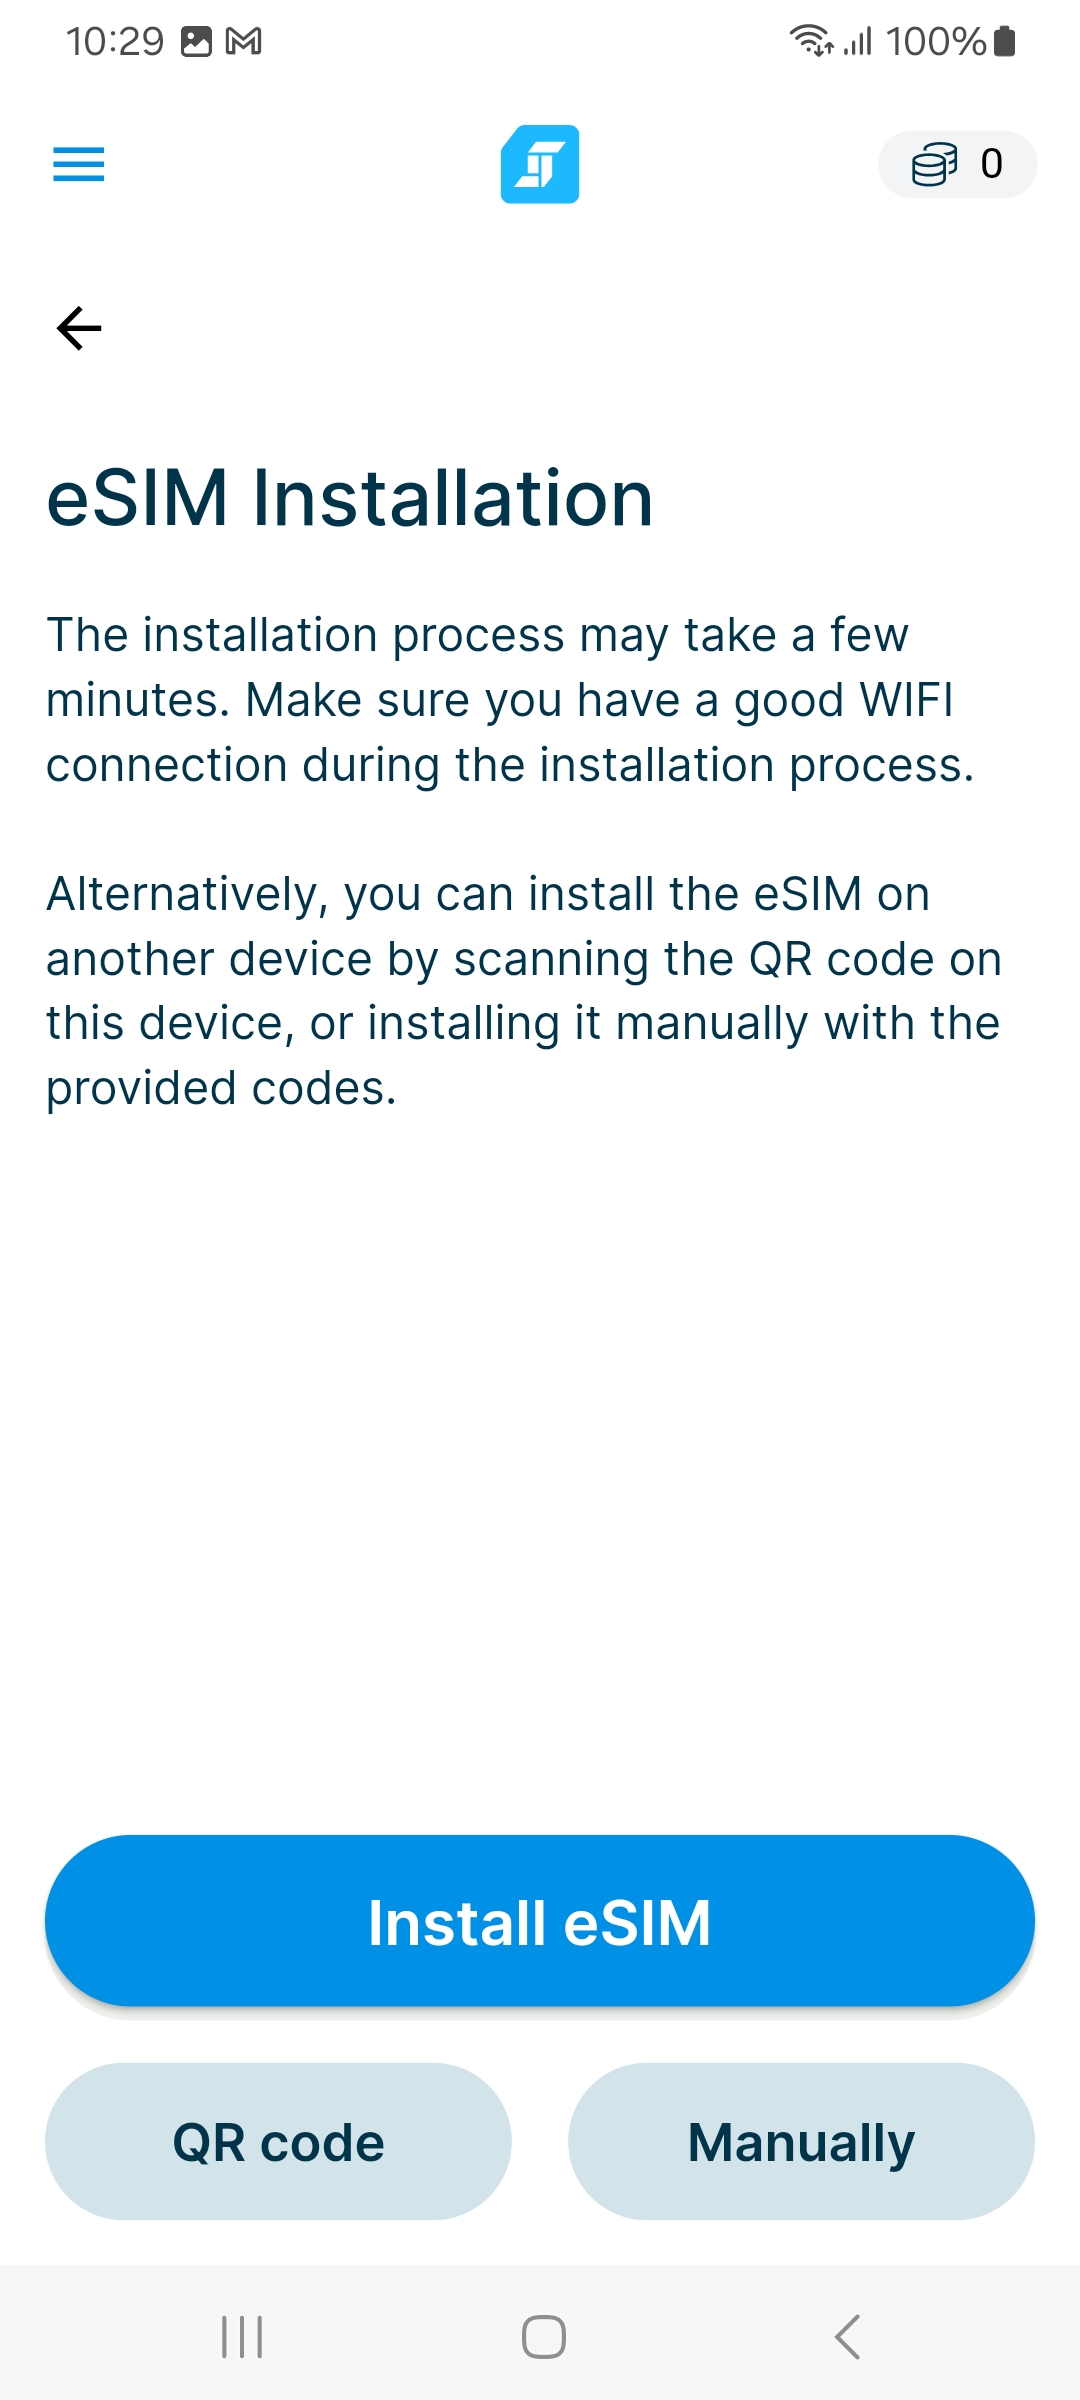
Tap the 'Manually' button to access the manual install page in the StaffTraveler eSIM app. It should look like this:
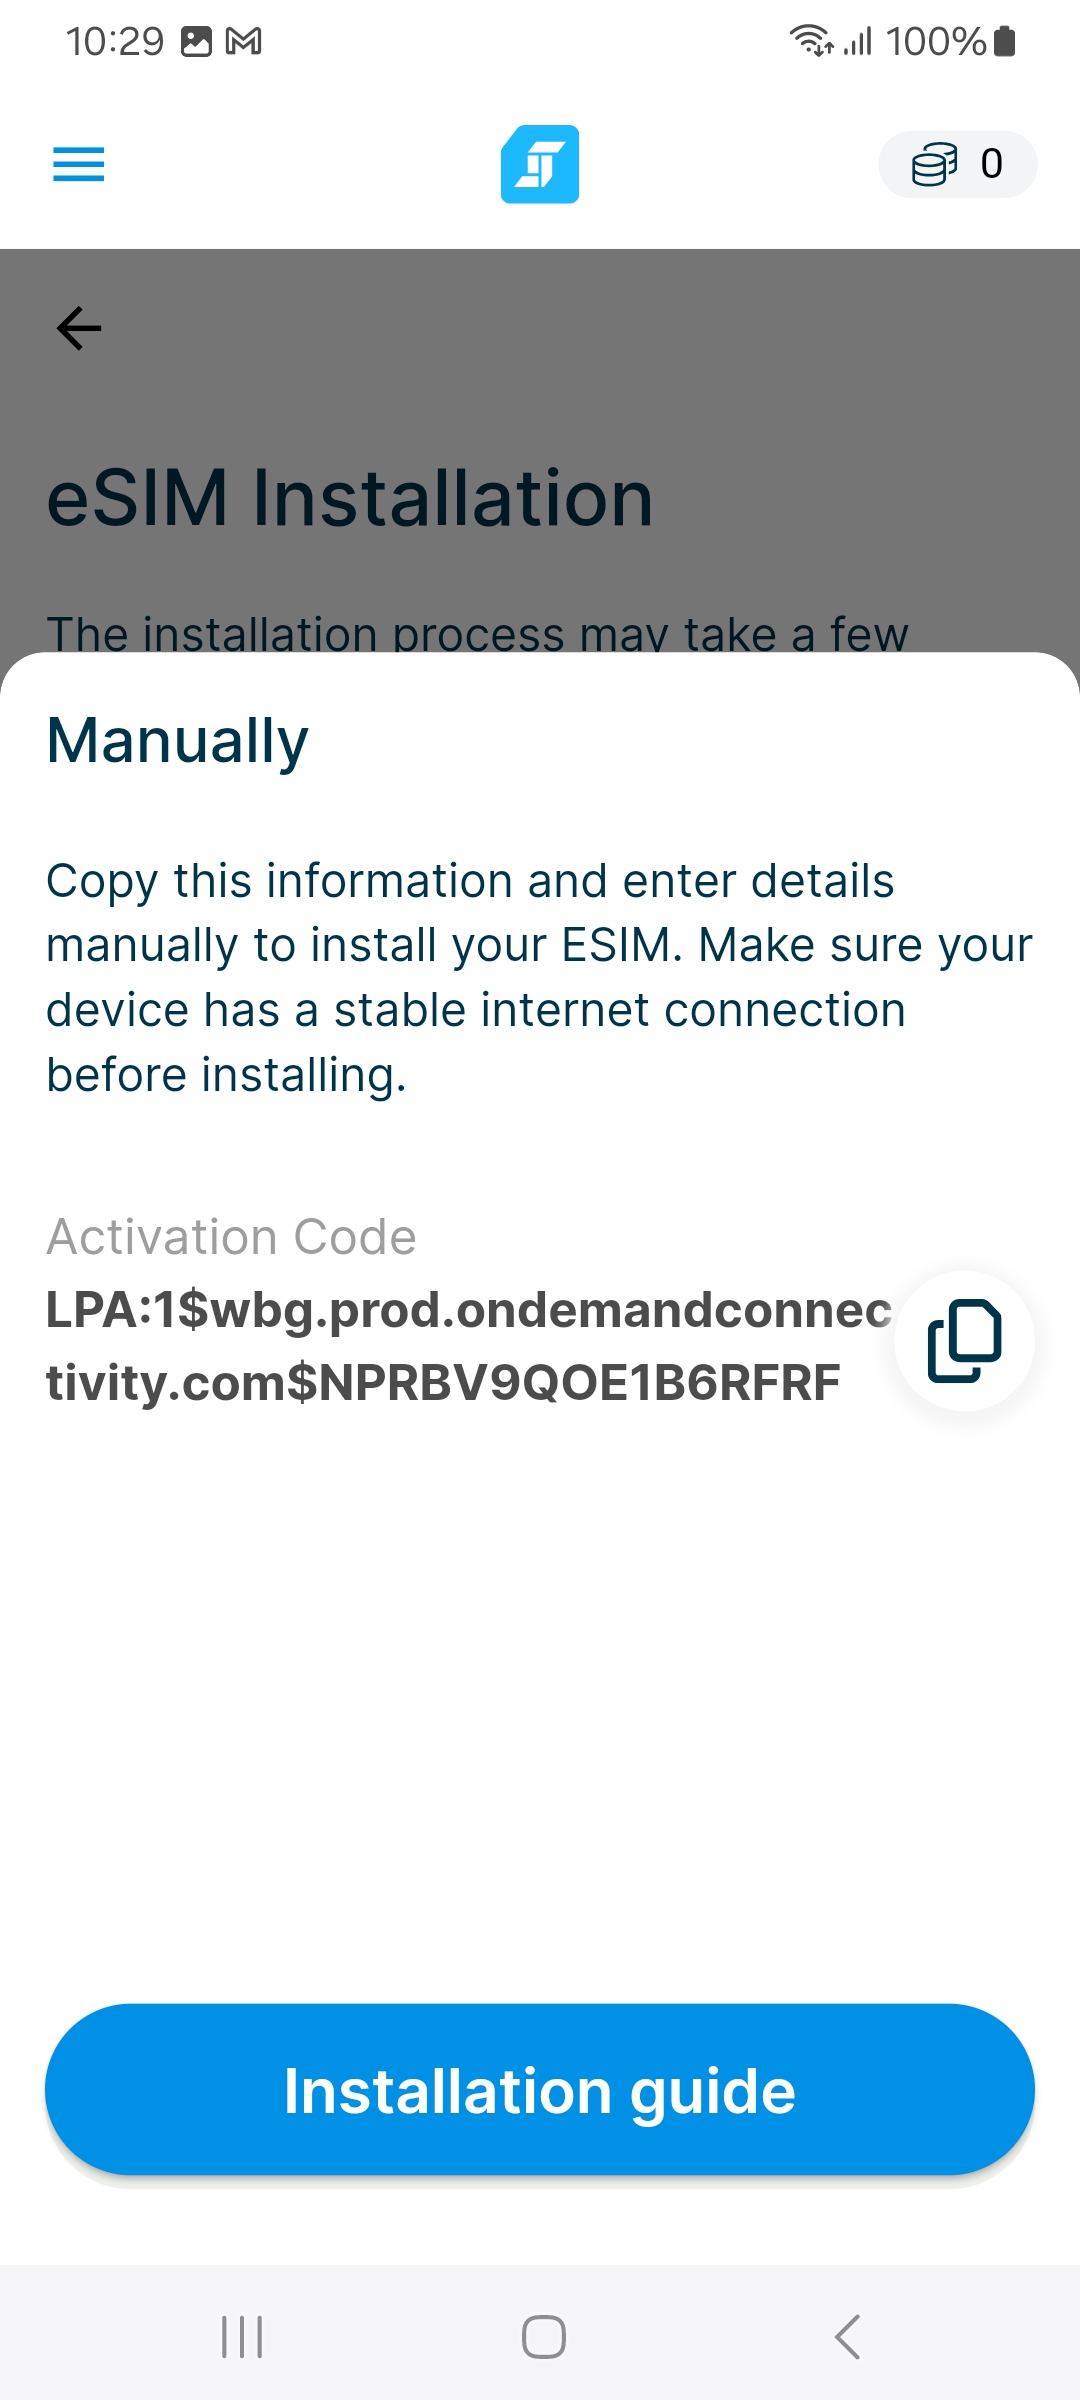
Tap the button next to the activation code to copy it to your clipboard. Then, open the eSIM.me app. Tap the '+' sign at the bottom right of the screen and select 'Manual'.
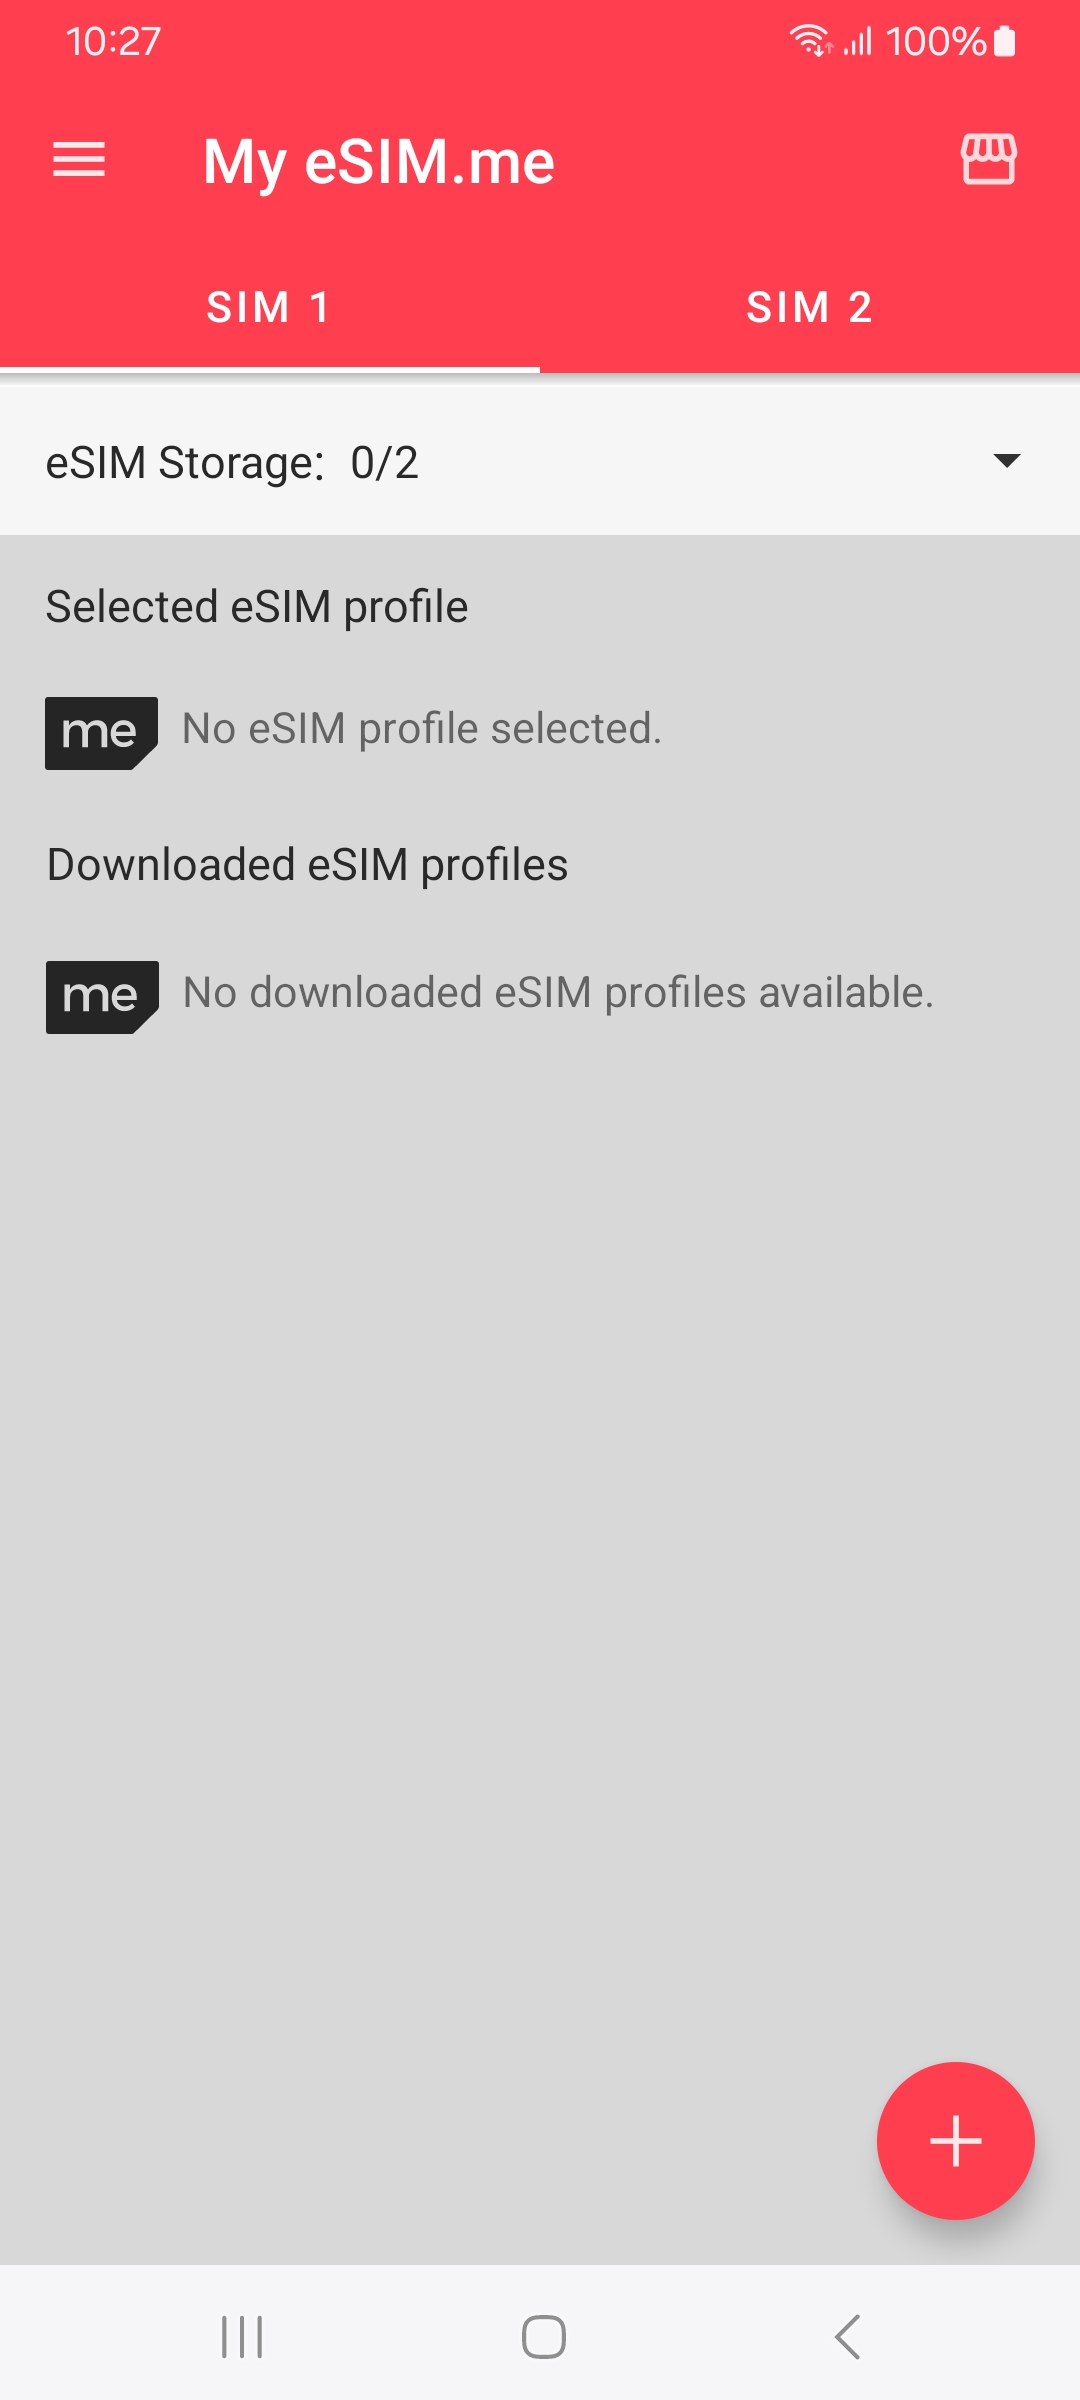
You should now see the following screen, but with blank input fields:
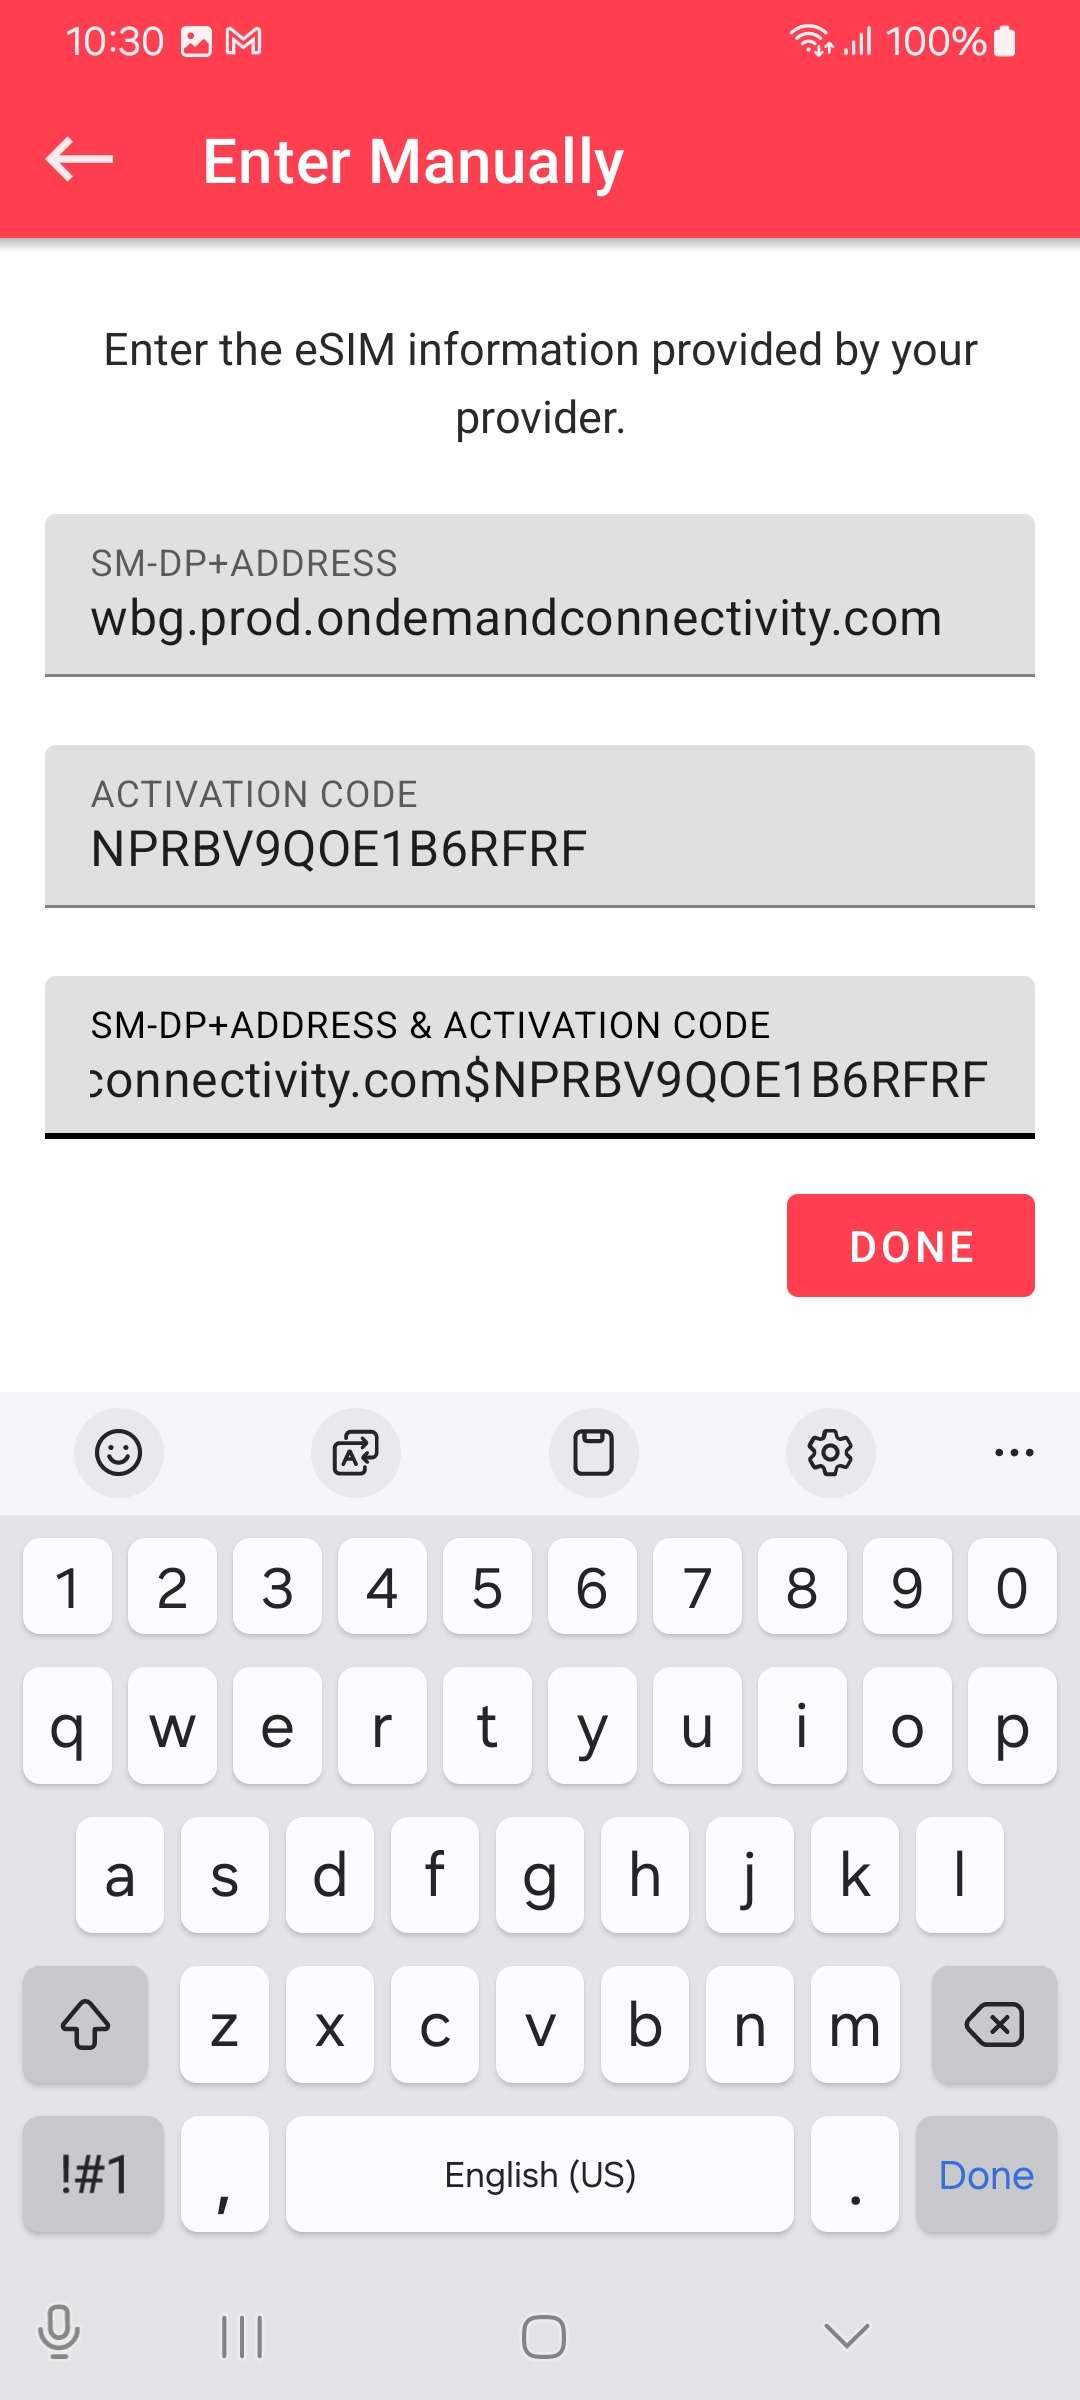
In the last field, paste the information from the StaffTraveler eSIM app you copied to the clipboard. The other fields should be filled in automatically. Now press "Done", and the installation will continue.
Step 9
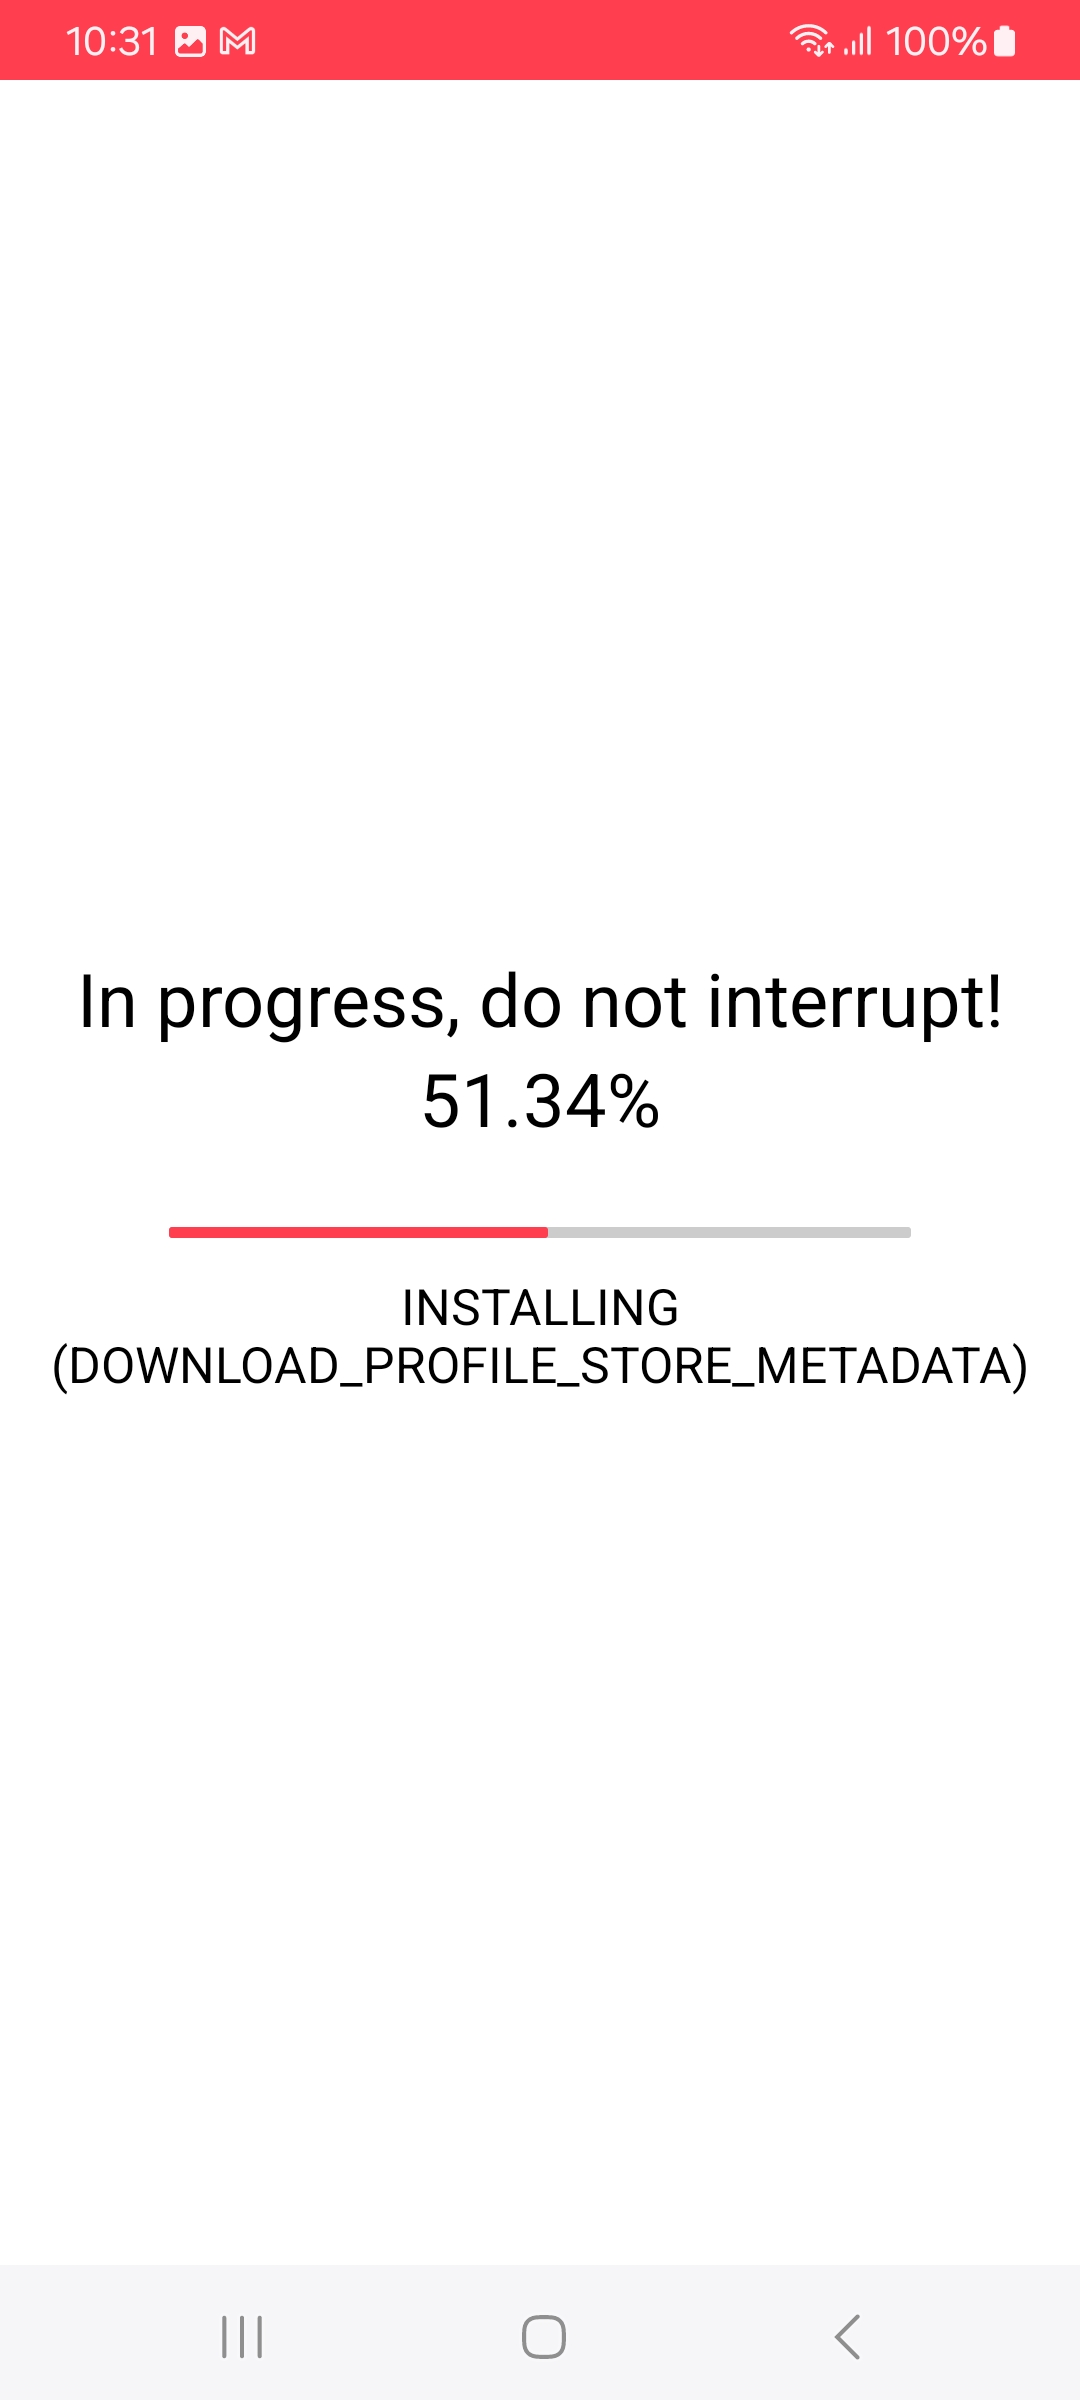
Make sure not to interrupt the process.
Step 10
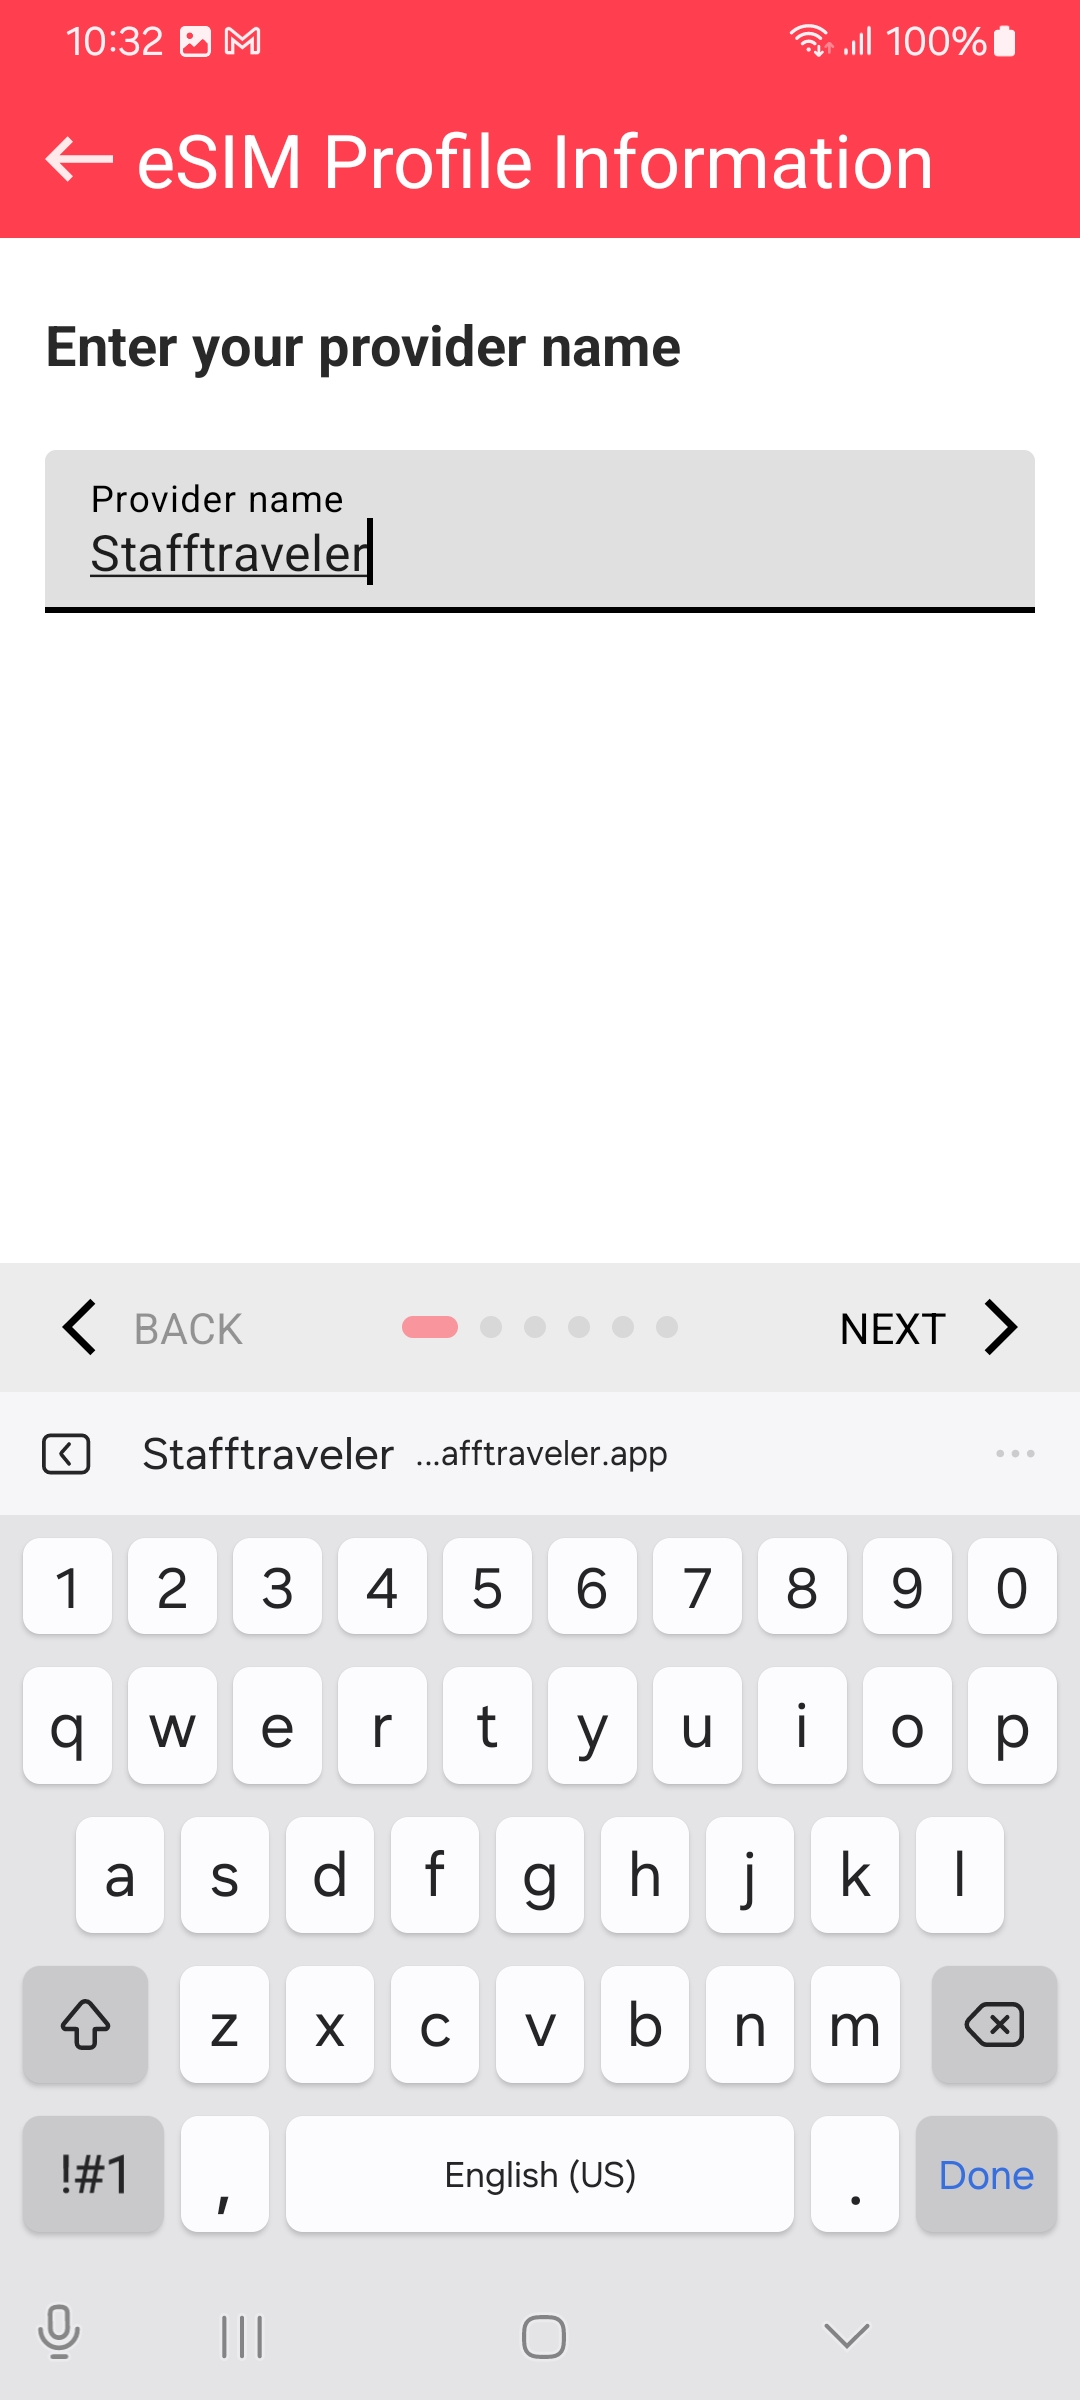
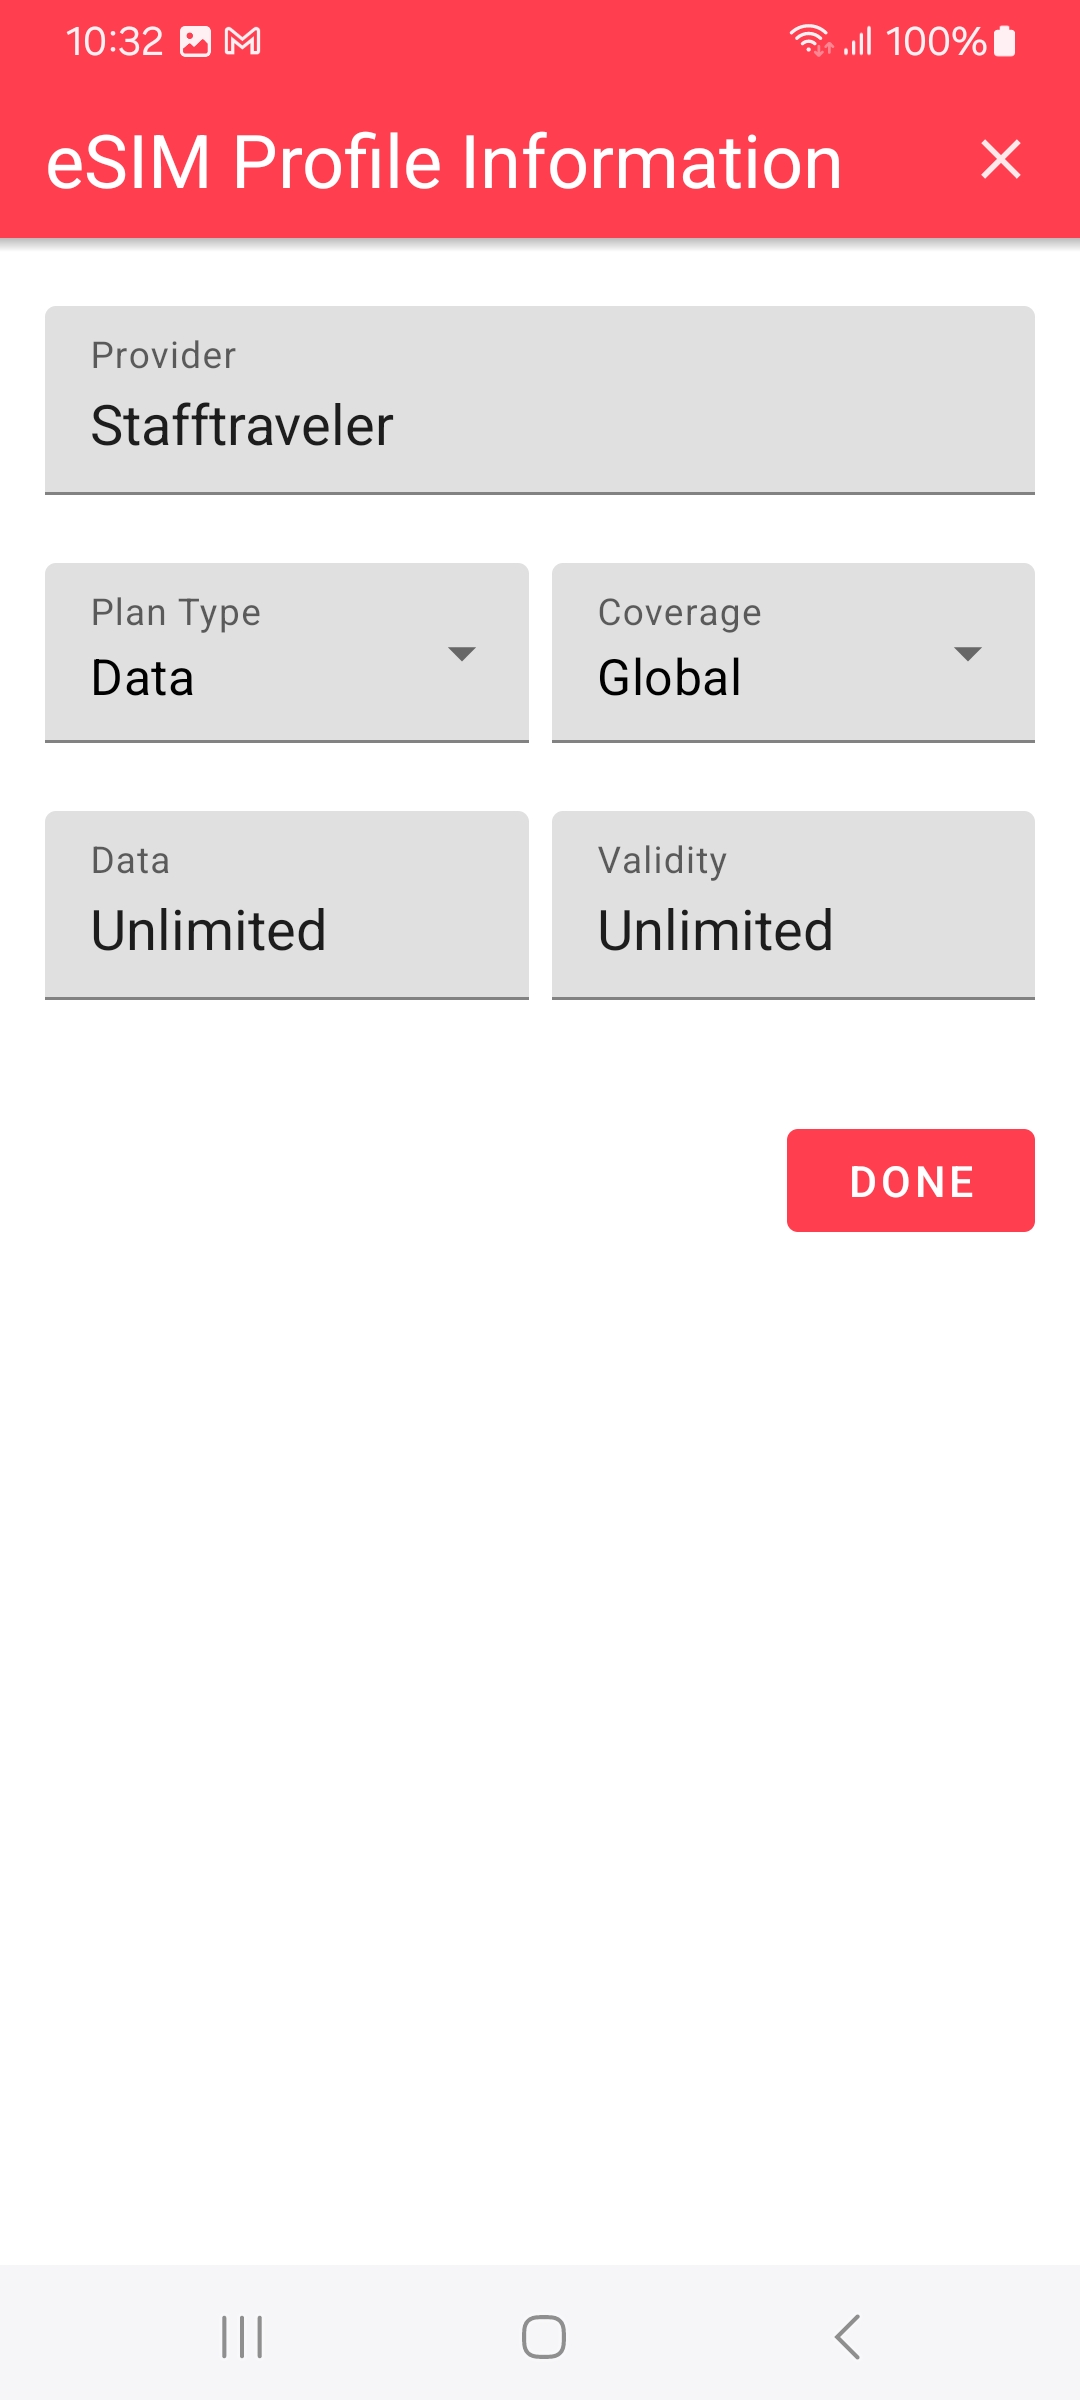
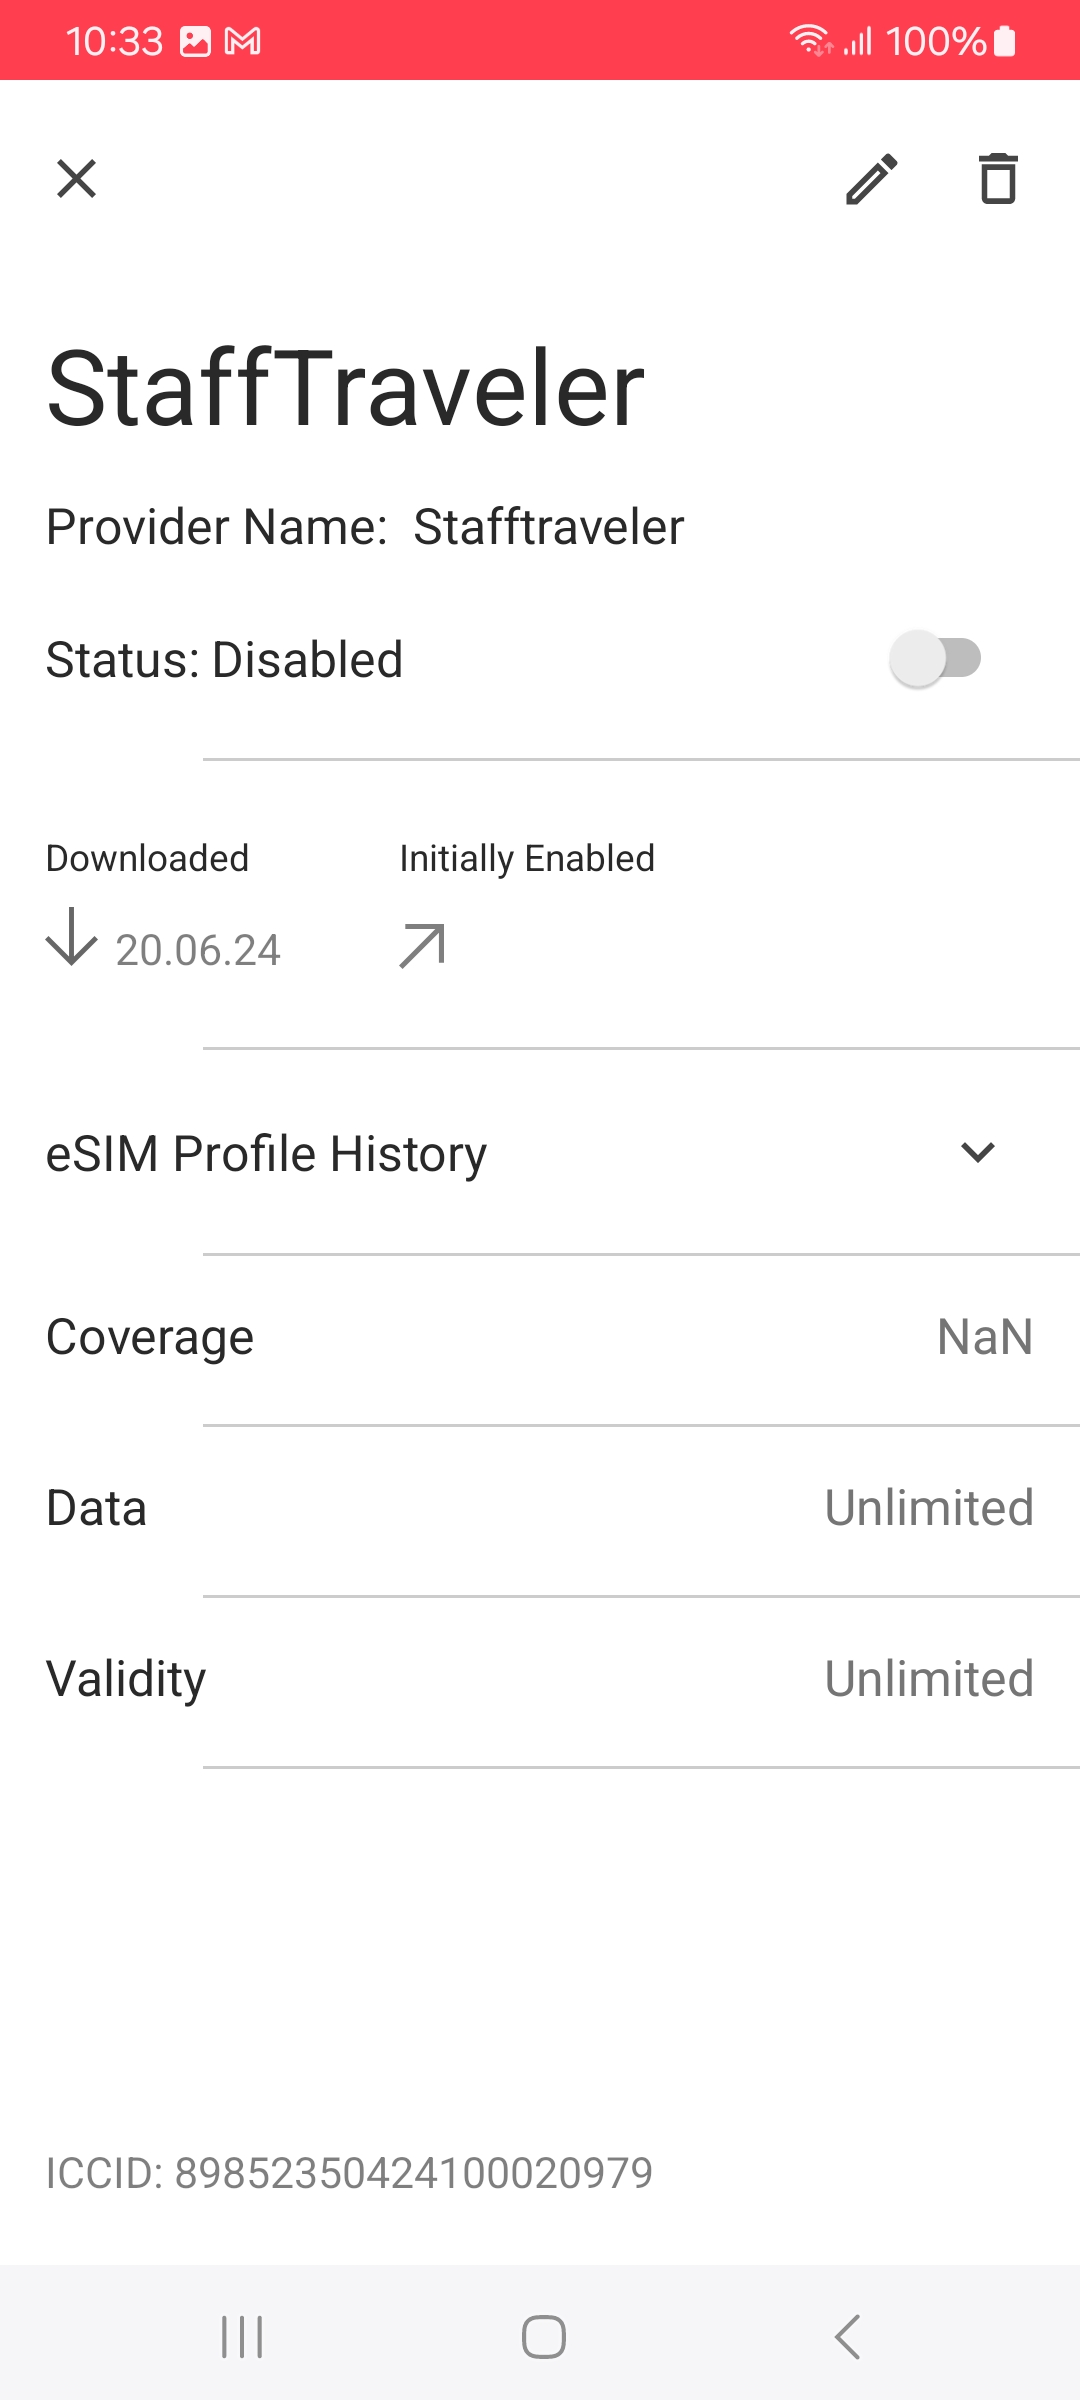
Change the provider and profile name from 'Voye' to 'StaffTraveler'.
Step 11
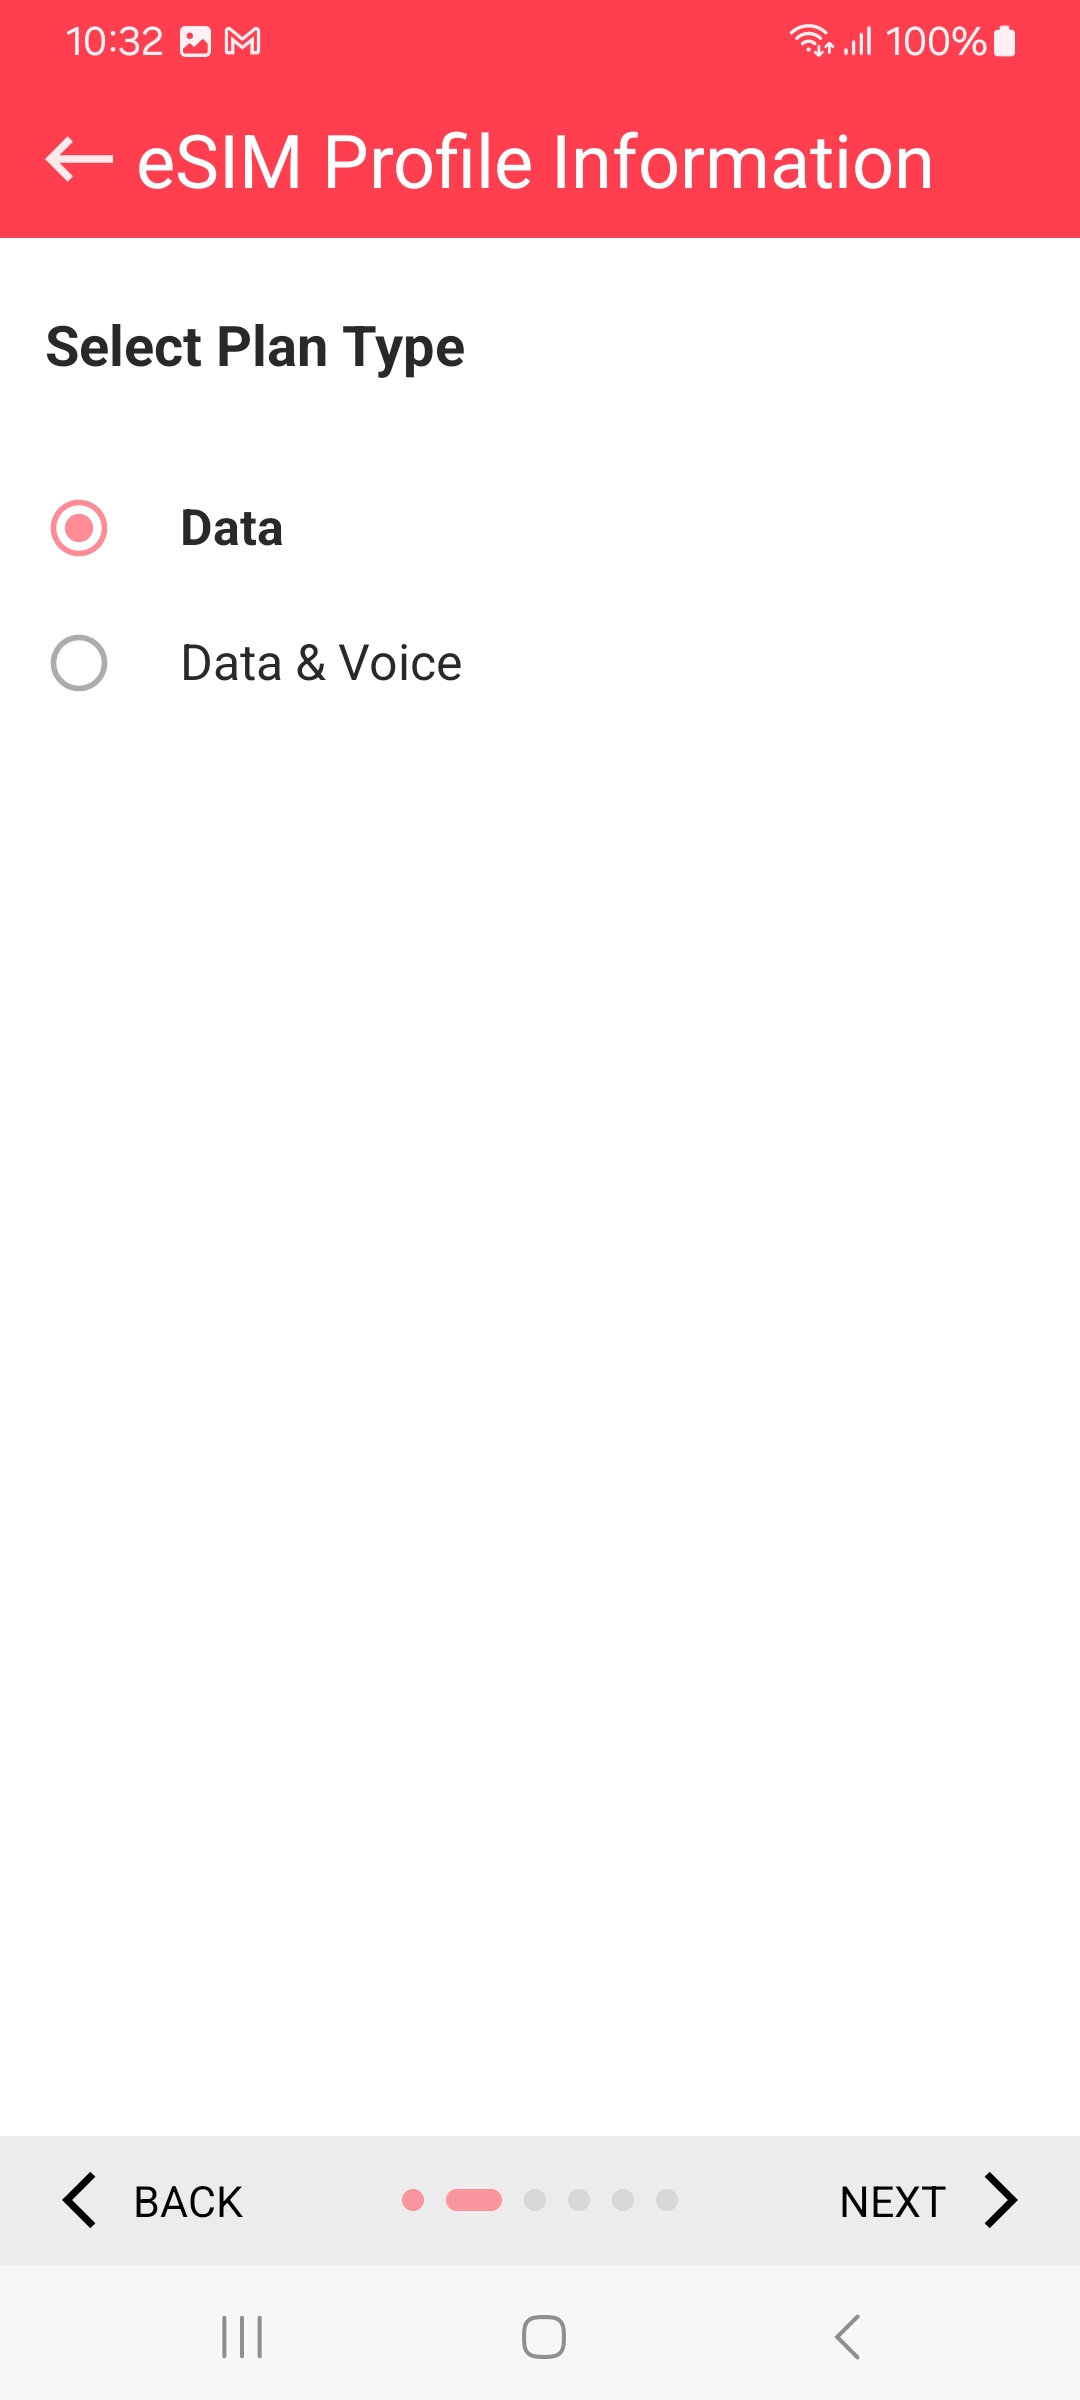
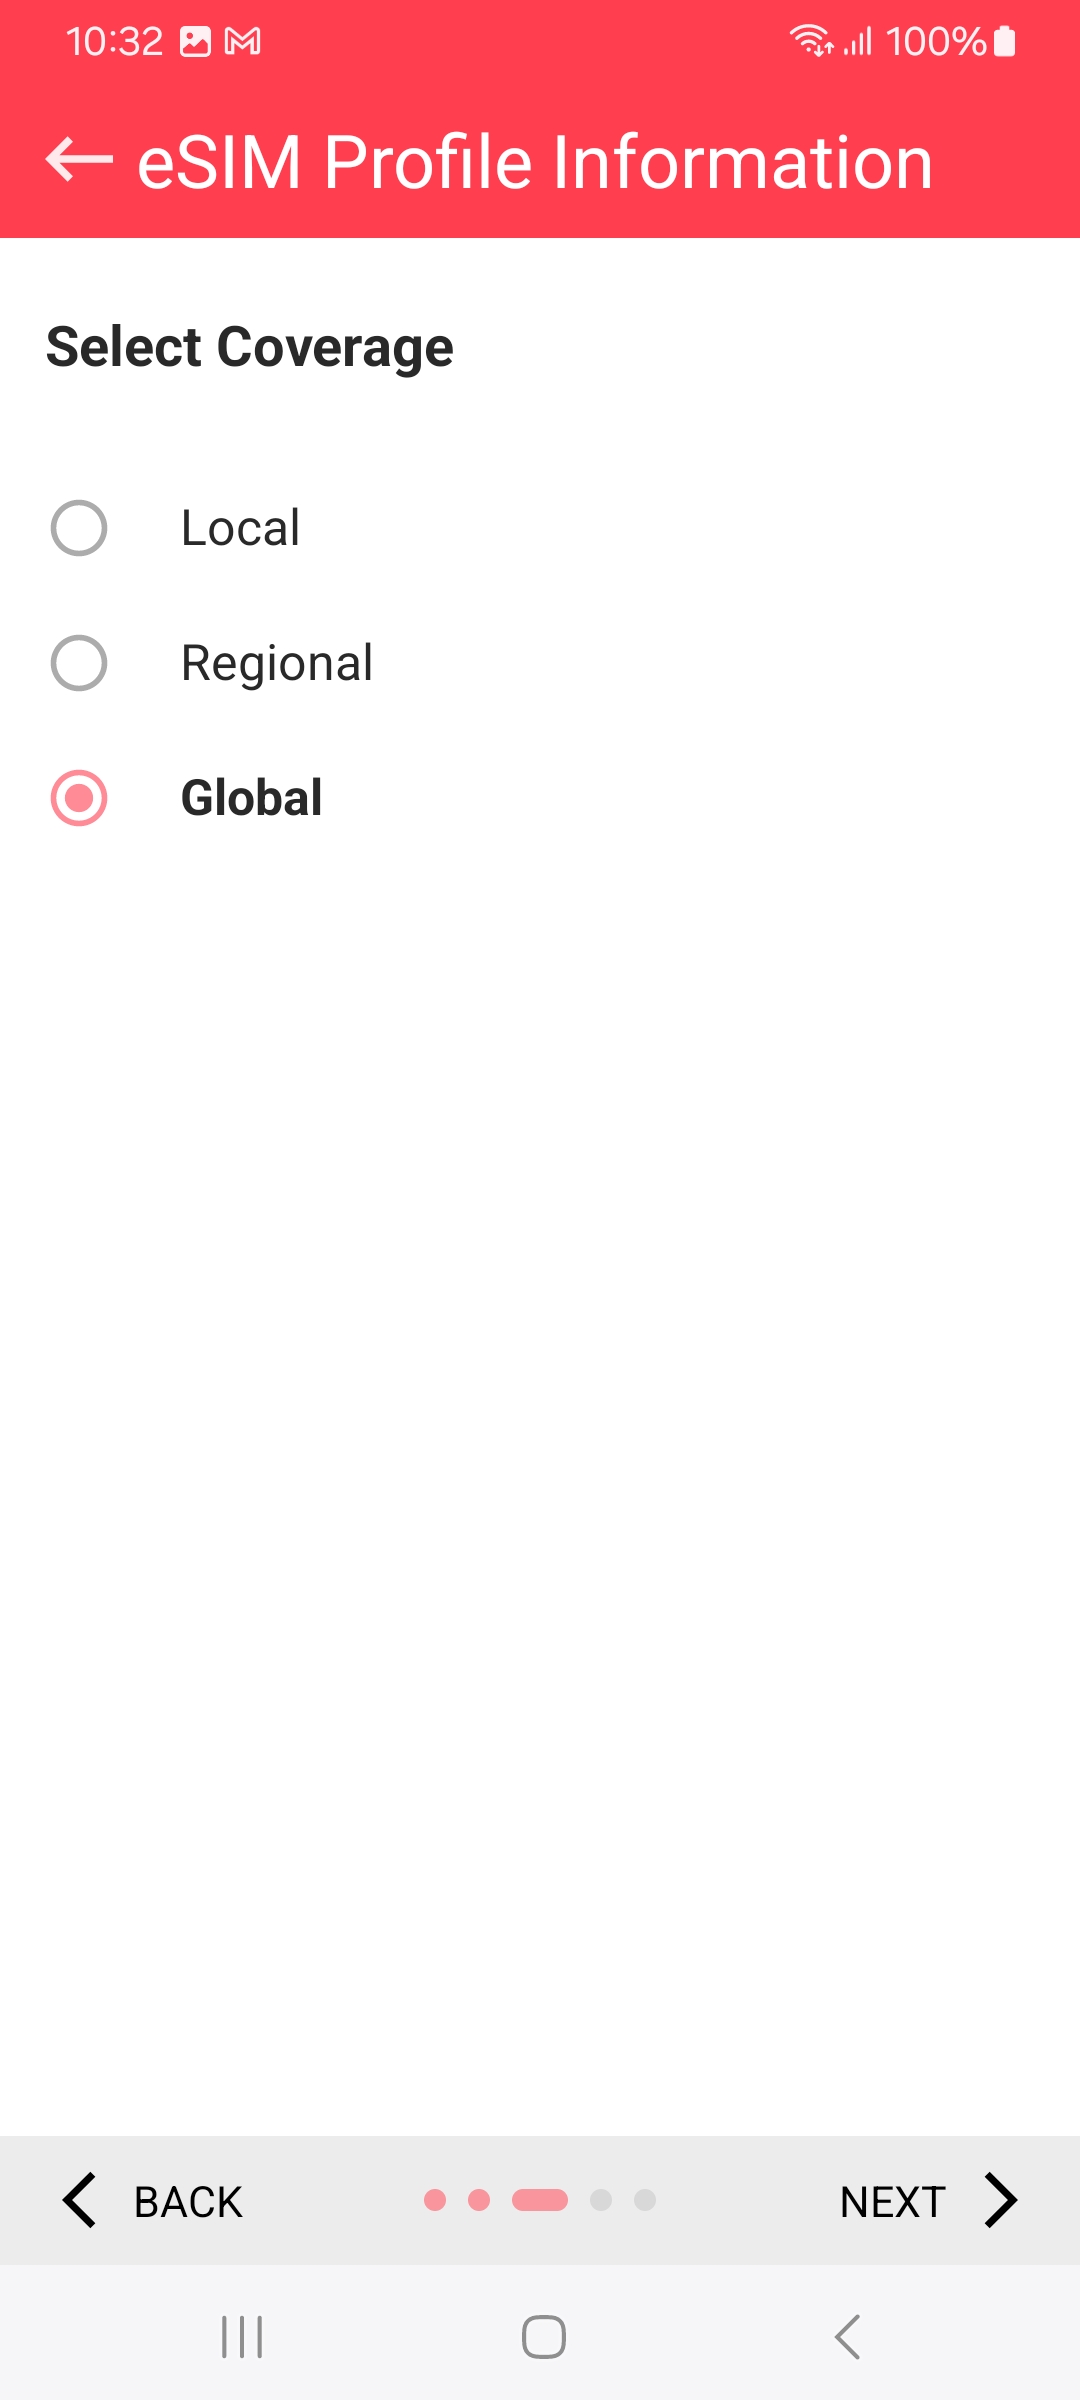
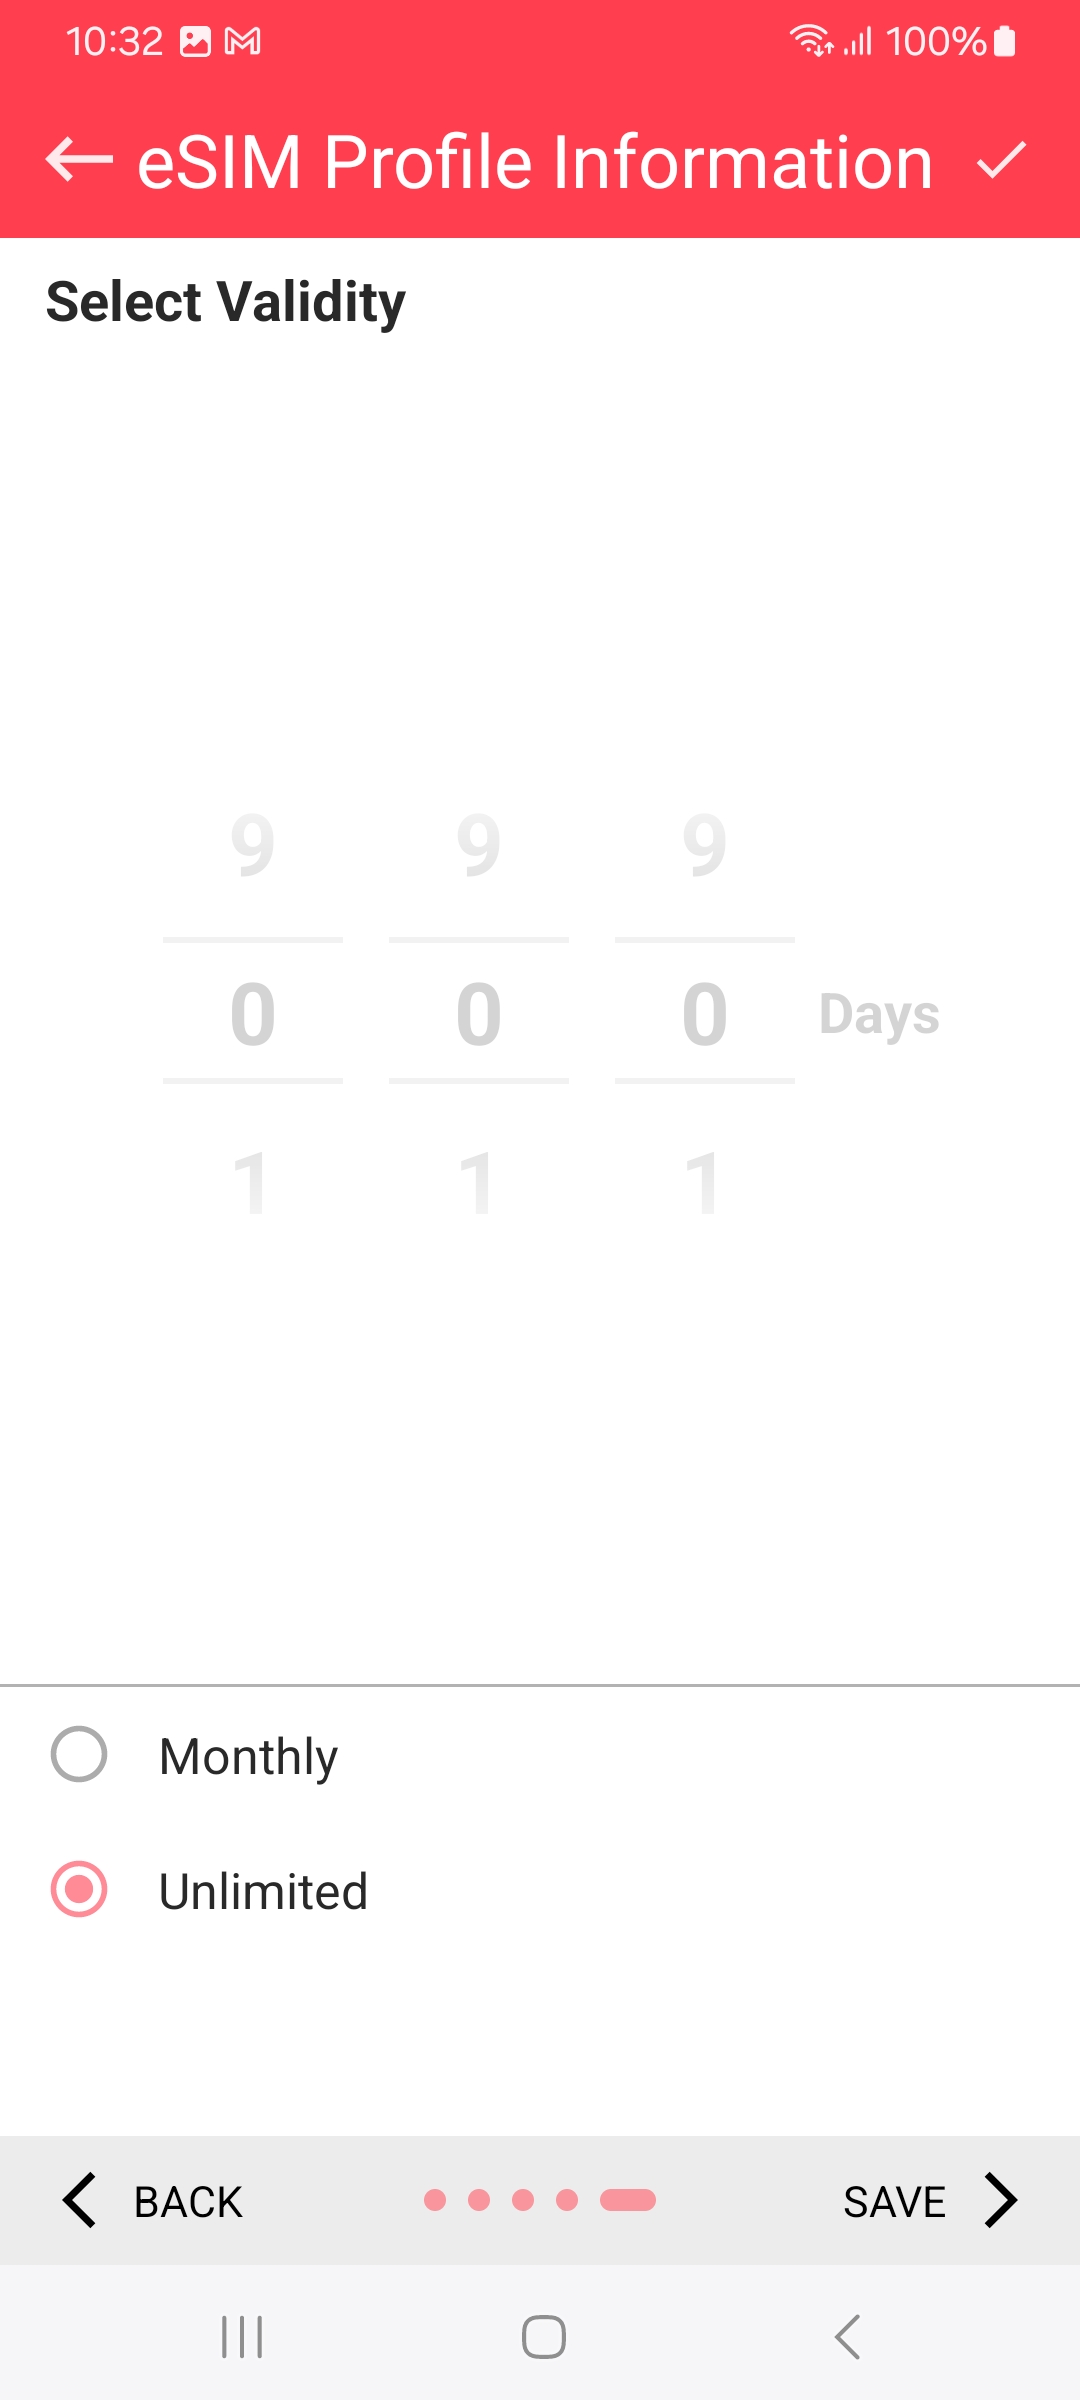
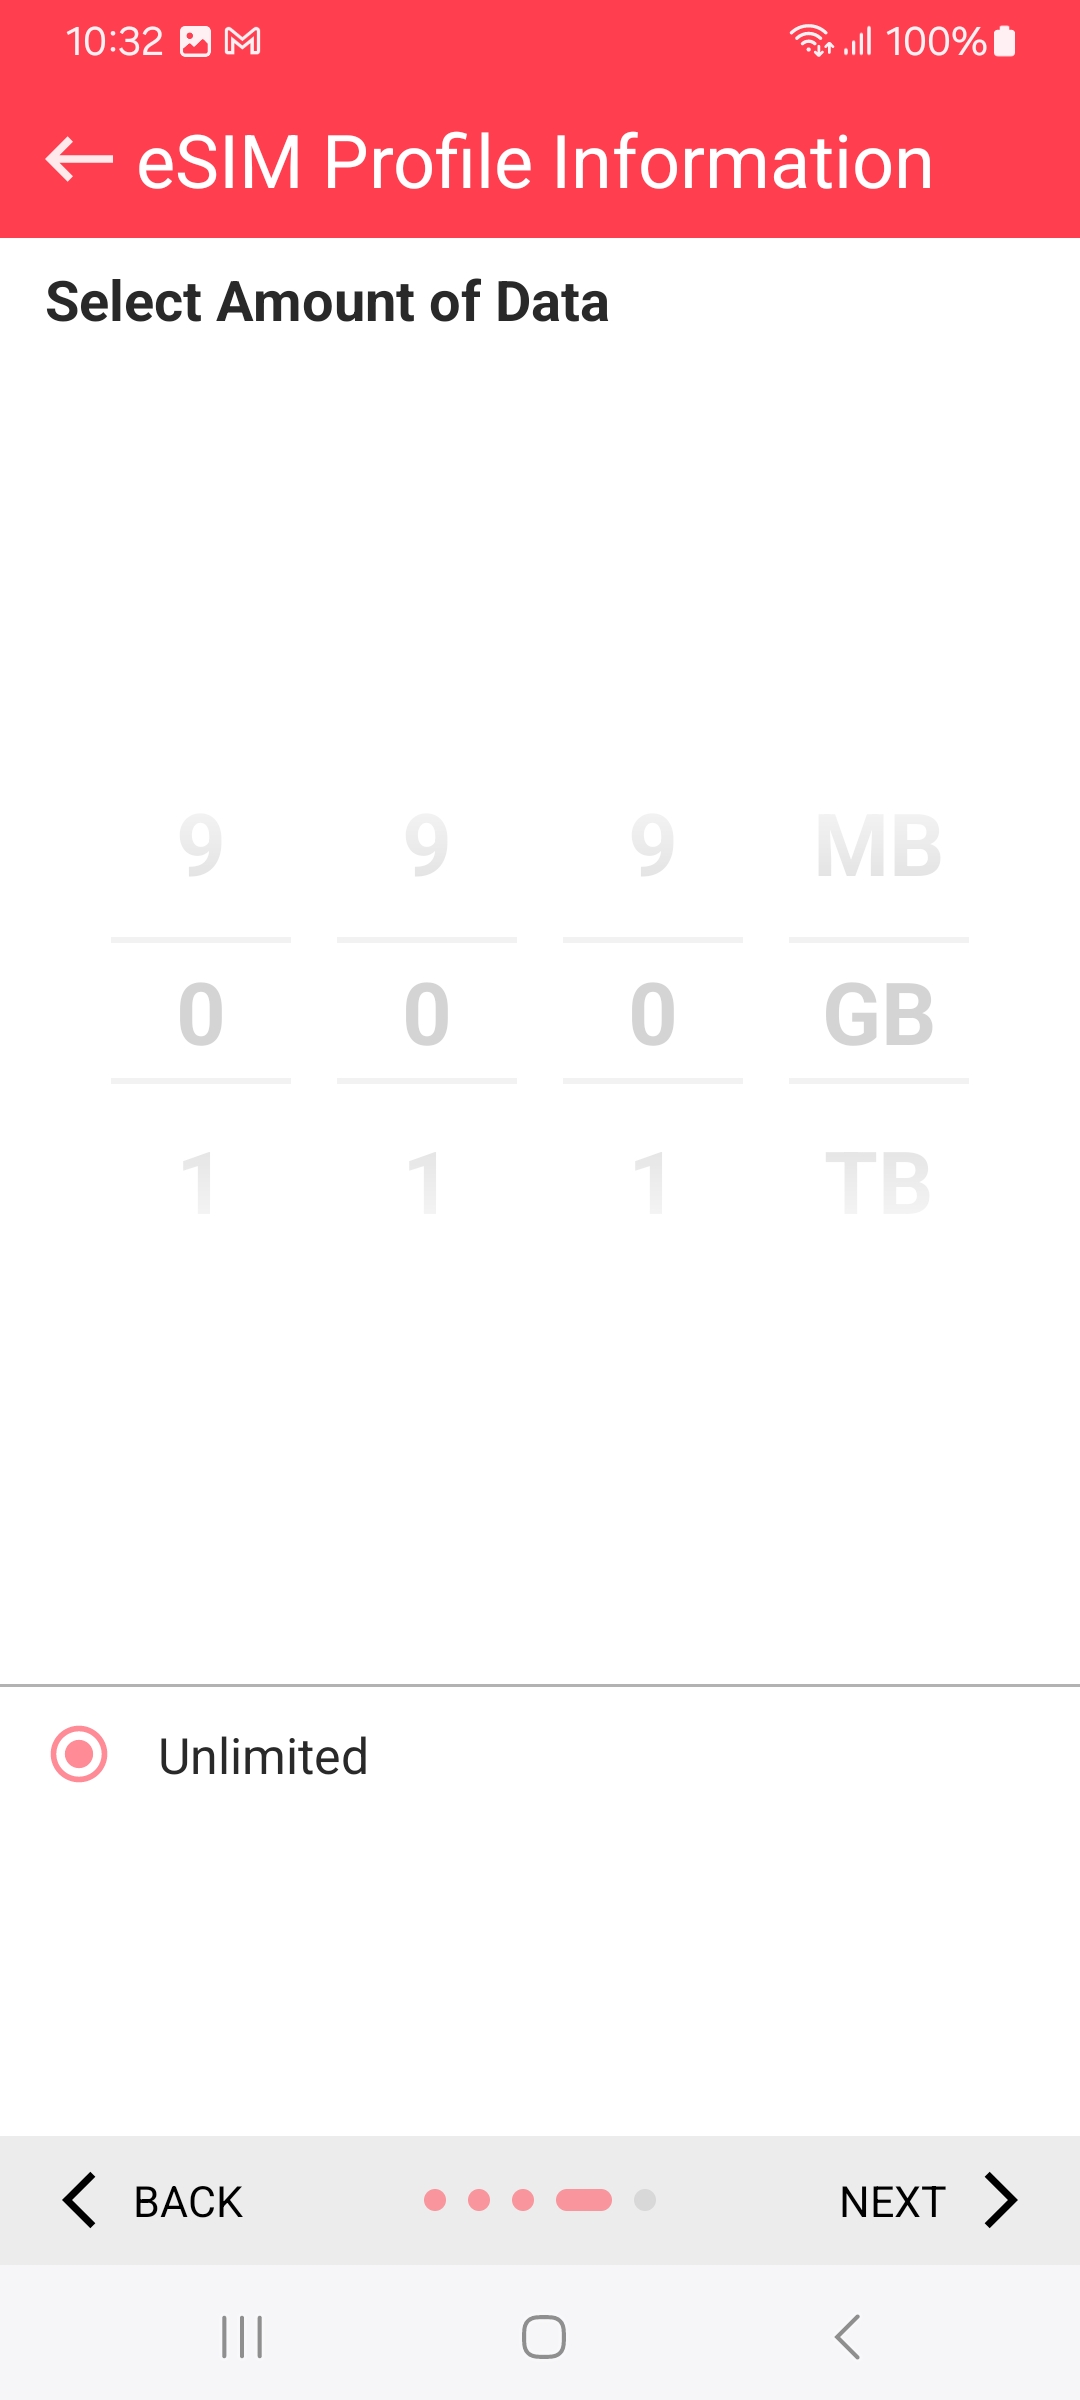
In the following steps, you will be asked a few questions. Please use the following settings:
Dataplan type: Data
Coverage: Global
Validity: Unlimited
Amount of data: Unlimited
Step 12
Enable the eSIM. You should now be in and able to select the profile. Please select 'Enable'.
Step 13
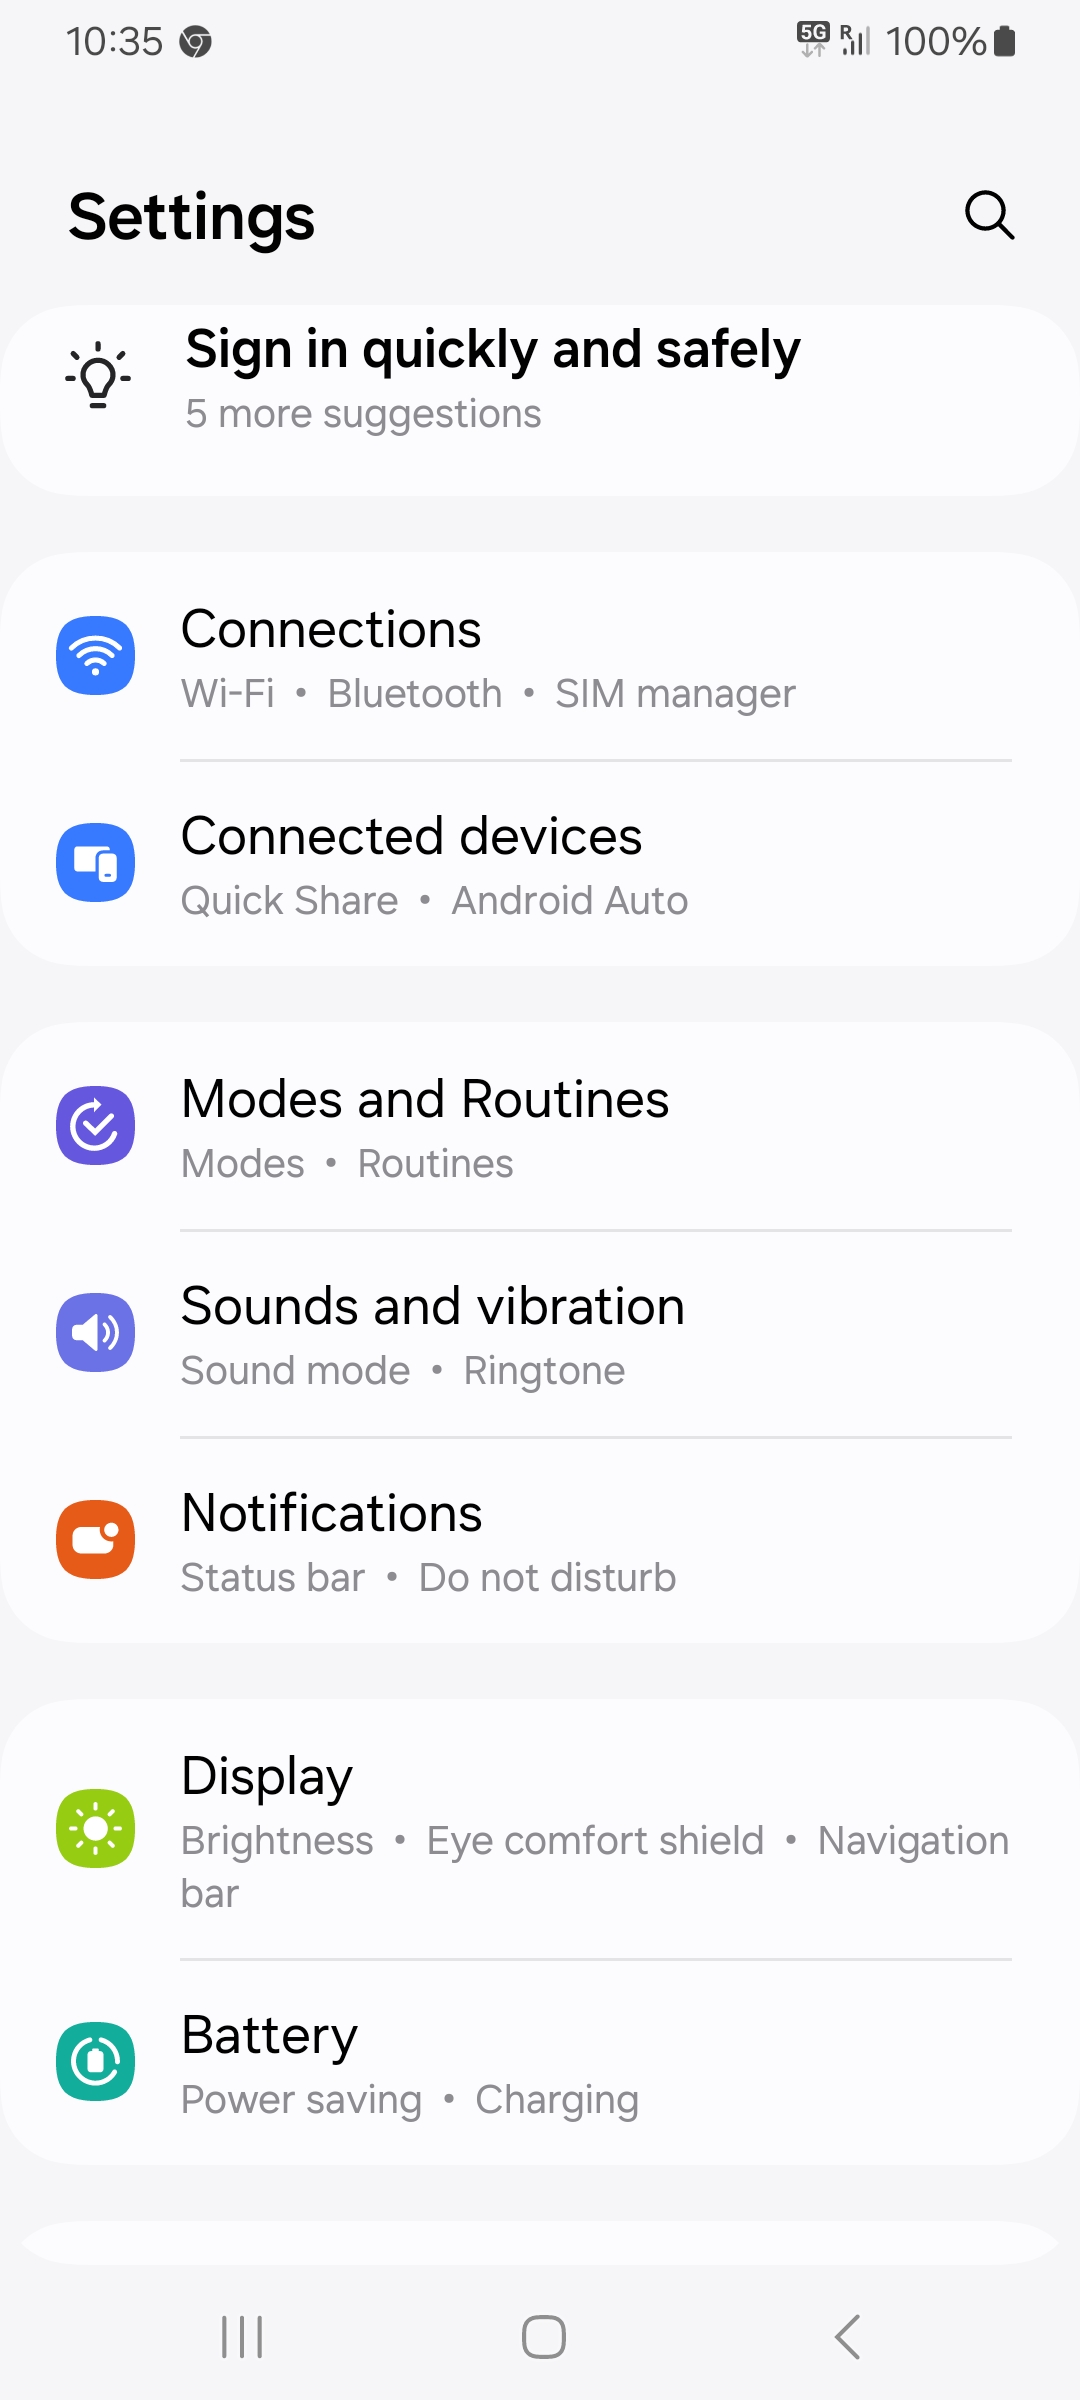
Let's wrap up the final steps on your phone, so you're all set!
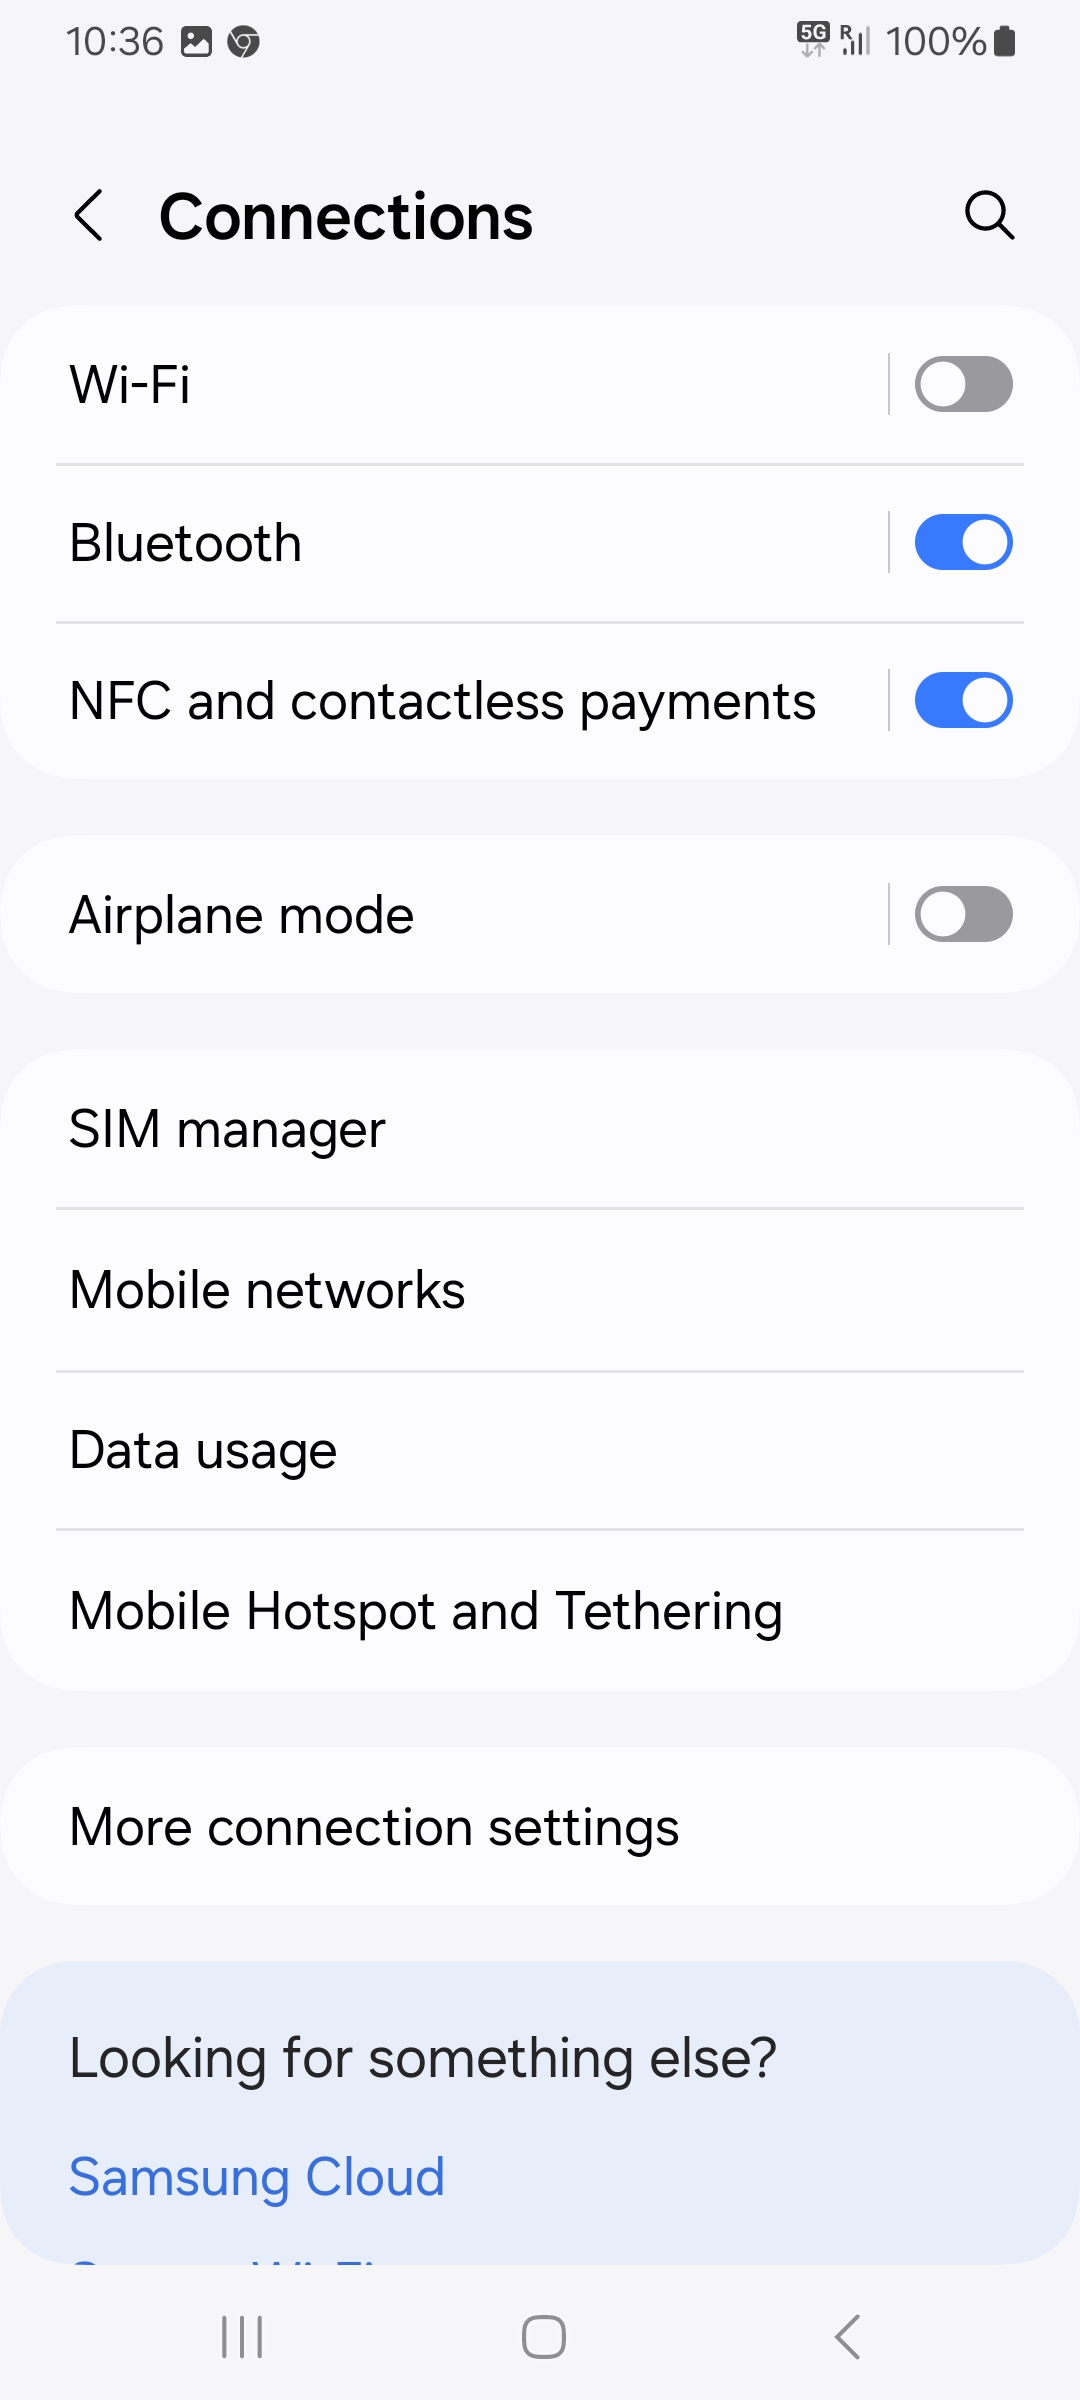
Navigate to 'Phone Settings' → 'Connections' → 'Mobile Networks'.
Here, make sure to enable roaming.
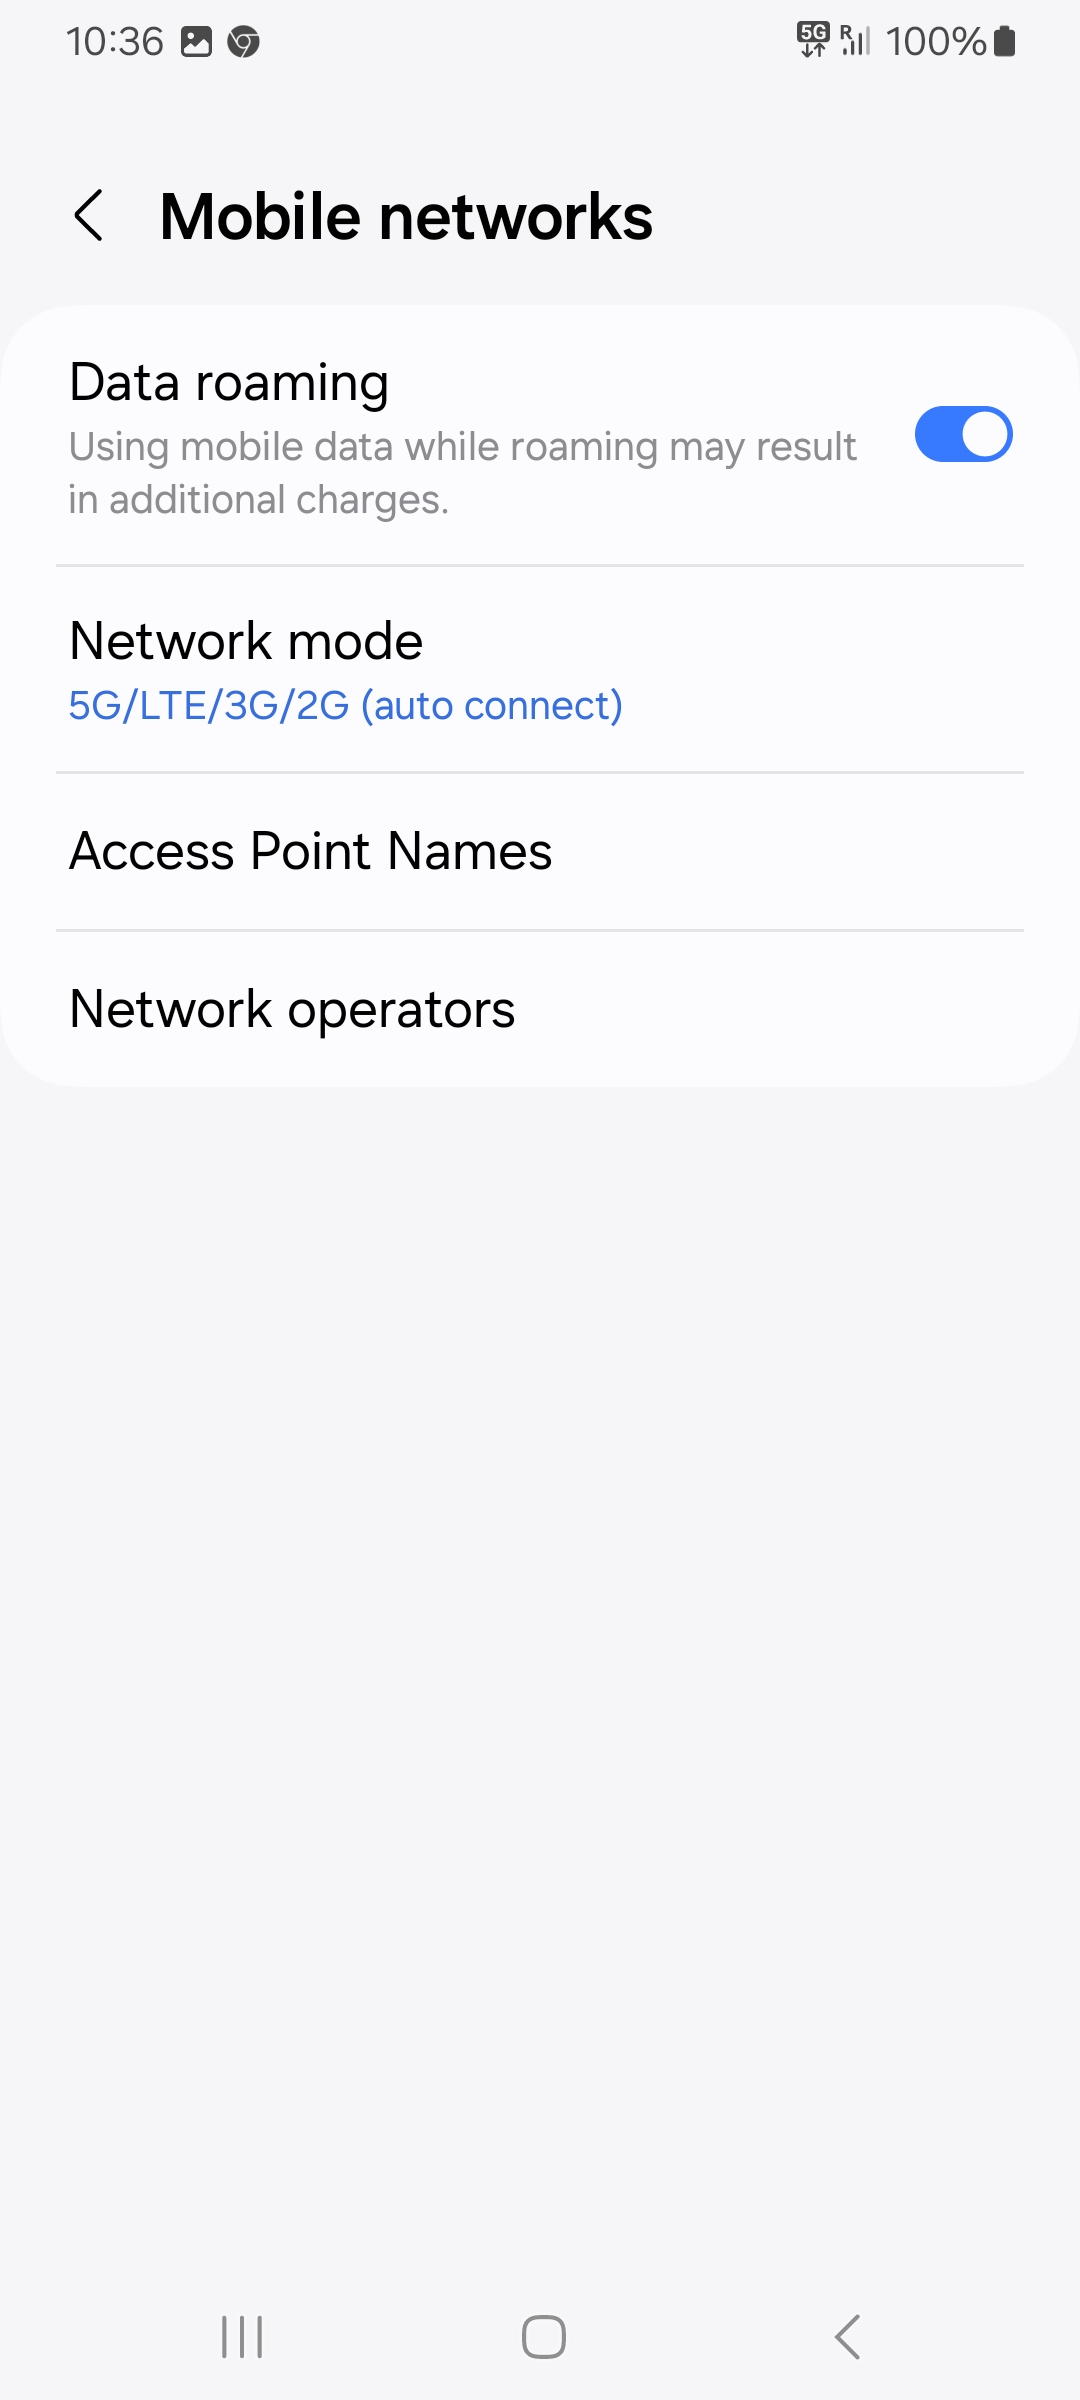
Your connection should now be working, and you're good to go!
If you want to turn off your StaffTraveler eSIM, you can find instructions in the following article: How to turn your eSIM on or off (Android)

