A stable internet connection is required to complete the process.
Please do not remove the eSIM from your device, as it cannot be used again afterward.
We recommend you label your new eSIM as StaffTraveler eSIM
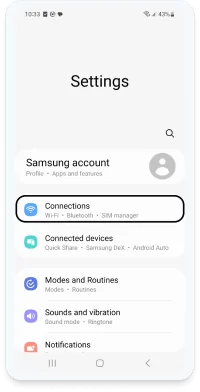
1 ➜ Go to “Settings” > “Connections”.
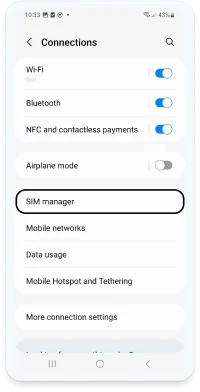
2 ➜ Go to “SIM card Manager”
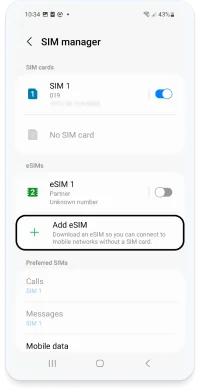
3 ➜Click “Add eSIM”
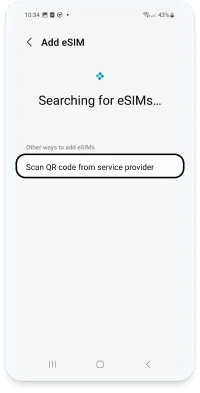
4 ➜ Tap on “Scan QR code from service provider”
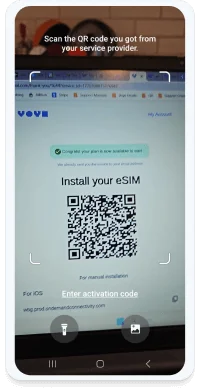
5➜ Scan your code:
*Note that the QR code must be present
on another screen or device
6 ➜ Click “Add”
*Note that this step might take a few moments
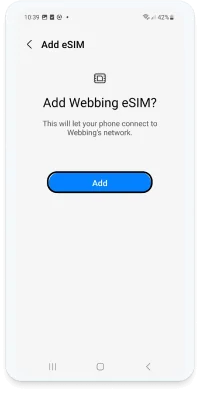
7 ➜ Congratulations!
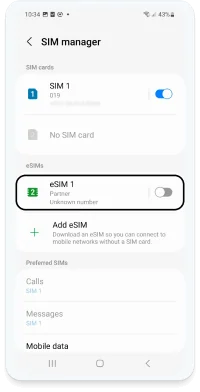
Your eSIM was added to your “SIM manager”.
Note that under Preferred SIMs:
“Calls” should be set on your SIM.
“Messages” should be set on your SIM.
“Mobile data” should be set on your eSIM.
To check that your eSIM works on Android:
Click on "Settings" > "Cellular"
Activate your eSIM
Turn on data roaming
Return to the page "Cellular" > "Cellular data"
Make sure you select your eSIM
Turn off "Allow cellular data exchange
Try to use the internet. Note that the initial synchronization might take a few minutes