Ensure you have a strong internet connection to finish the process, and don't remove the eSIM from your device because it can't be reused afterward.
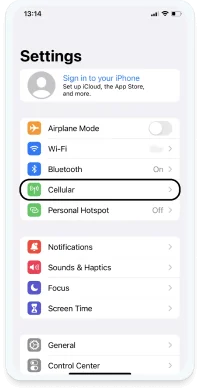
Step 1
Go to 'Settings' > 'Cellular'.
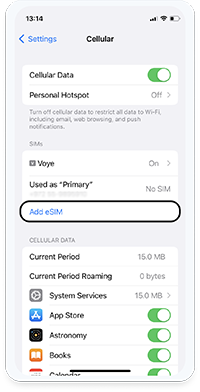
Step 2
Tap 'Add eSIM'.
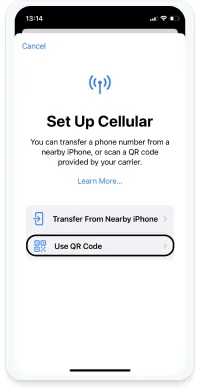
Step 3
Tap 'Use QR code'.
Step 4
Scan the QR code. The best method is to take a screenshot and display it on another device for scanning.

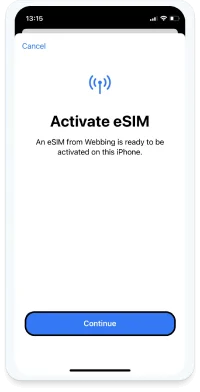
Step 5
Tap 'Continue'. This step may take a few moments.
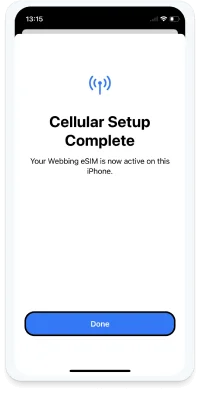
Step 6
Tap 'Done'.
Step 7
Click the eSIM that was added under 'Cellular Plan Labels' to change the name of your eSIM.
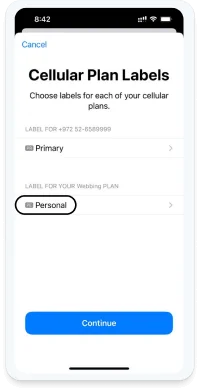
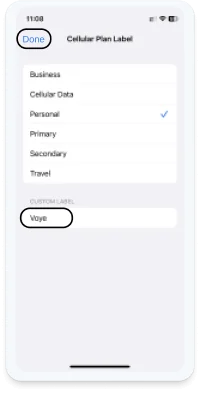
Step 8
Update your eSIM name to 'StaffTraveler' and select 'Done' on the upper right side.
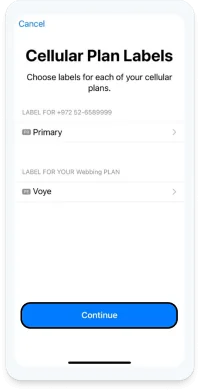
Step 9
Tap 'Continue'
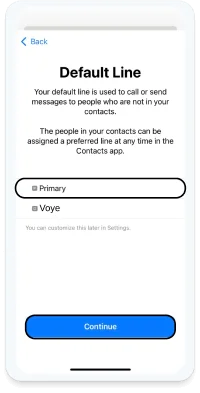
Step 10
Continue with the installation process and mark 'Primary' for 'Default Line'.
Step 11
Continue with the installation process and mark 'Primary' for iMessage & FaceTime.

Step 12
Congratulations! Your eSIM was added to your 'Cellular' page.
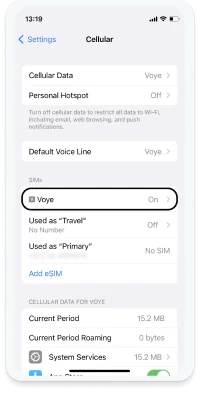
To verify that your eSIM works on iOS:
Tap 'Settings' > 'Cellular'
Turn your StaffTraveler eSIM on
Turn on 'Data Roaming' on your StaffTraveler eSIM
Turn your Wi-Fi off
Tap 'Mobile Data'
Select StaffTraveler eSIM
De-select 'Allow Mobile Data Switching'
Try to use the internet. Note that the initial synchronization might take a few minutes
You are now connected! To return to your primary SIM, set your Mobile Data to your primary SIM and turn off the StaffTraveler eSIM.